Thank You:
Like my work don't forget to rate it ThemeForest Downloads
This is a step by step guide to installing Vultur theme and a look at the initial setup of the theme.
We would like to thank you for purchasing Vultur WordPress Theme! We are very pleased that you have chosen Vultur WordPress Theme for your website. Before you get started, please be sure to always search our Documentation and Knowledgebase. Vultur WordPress Theme can be used with WordPress and we assume that you already have WordPress installed and ready to go. Vultur WordPress Theme is a one click installation theme. If you do not, please follow this link WordPress Installation to see our section on WordPress to help you get started.
Created : 07.05.2020
Updated : 18.05.2020
by: ThemeIoan
email: ioan@drozd.at
Vultur WordPress Theme comes with 4 different uniquely and minimally designed Homepages and different Theme Color options. Feature your skills and talent by showcasing the samples of your Website designs, artwork and more in the portfolio section of this WordPress Theme. The Theme also has a single page and multi-page options so you can set it up and customize it according to your need. The overall layout of this Vultur WordPress Theme is fully responsive so it can be viewed on any mobile and tablet devices without compromising it’s cool design elements. Also, the Theme is developed on the latest WordPress version and you will be getting 100% support from our team.
Features of the theme
Like my work don't forget to rate it ThemeForest Downloads
You can install the theme in two ways: through WordPress, or via FTP. The vultur.zip file is the Installable WordPress Theme and that is what you need to use to get the theme installed. Please see the following sections for each method.
1) Installation via FTP: Prefer upload the un-zipped theme folder
2) Installation via WordPress: Install and Activate
Required Plugins:
Vultur Core -Theme Setting – Core plugin for Vultur Theme.
Unyson – Drag and Drop - Framework to build Page.
Woocommerce – Required for shop pages functionality.
LearnPress – WordPress LMS Plugin – Add online courses and LMS functionality.
LearnPress – Course Review – Add course review stars functionality.
Contact Form 7 – Required for creating custom contact and registration forms.
Recommended Plugins (optional):
Social Sharing Buttons – Social Pug – Add social sharing functionality.
How To Install Vultur WordPress Theme! via WordPress
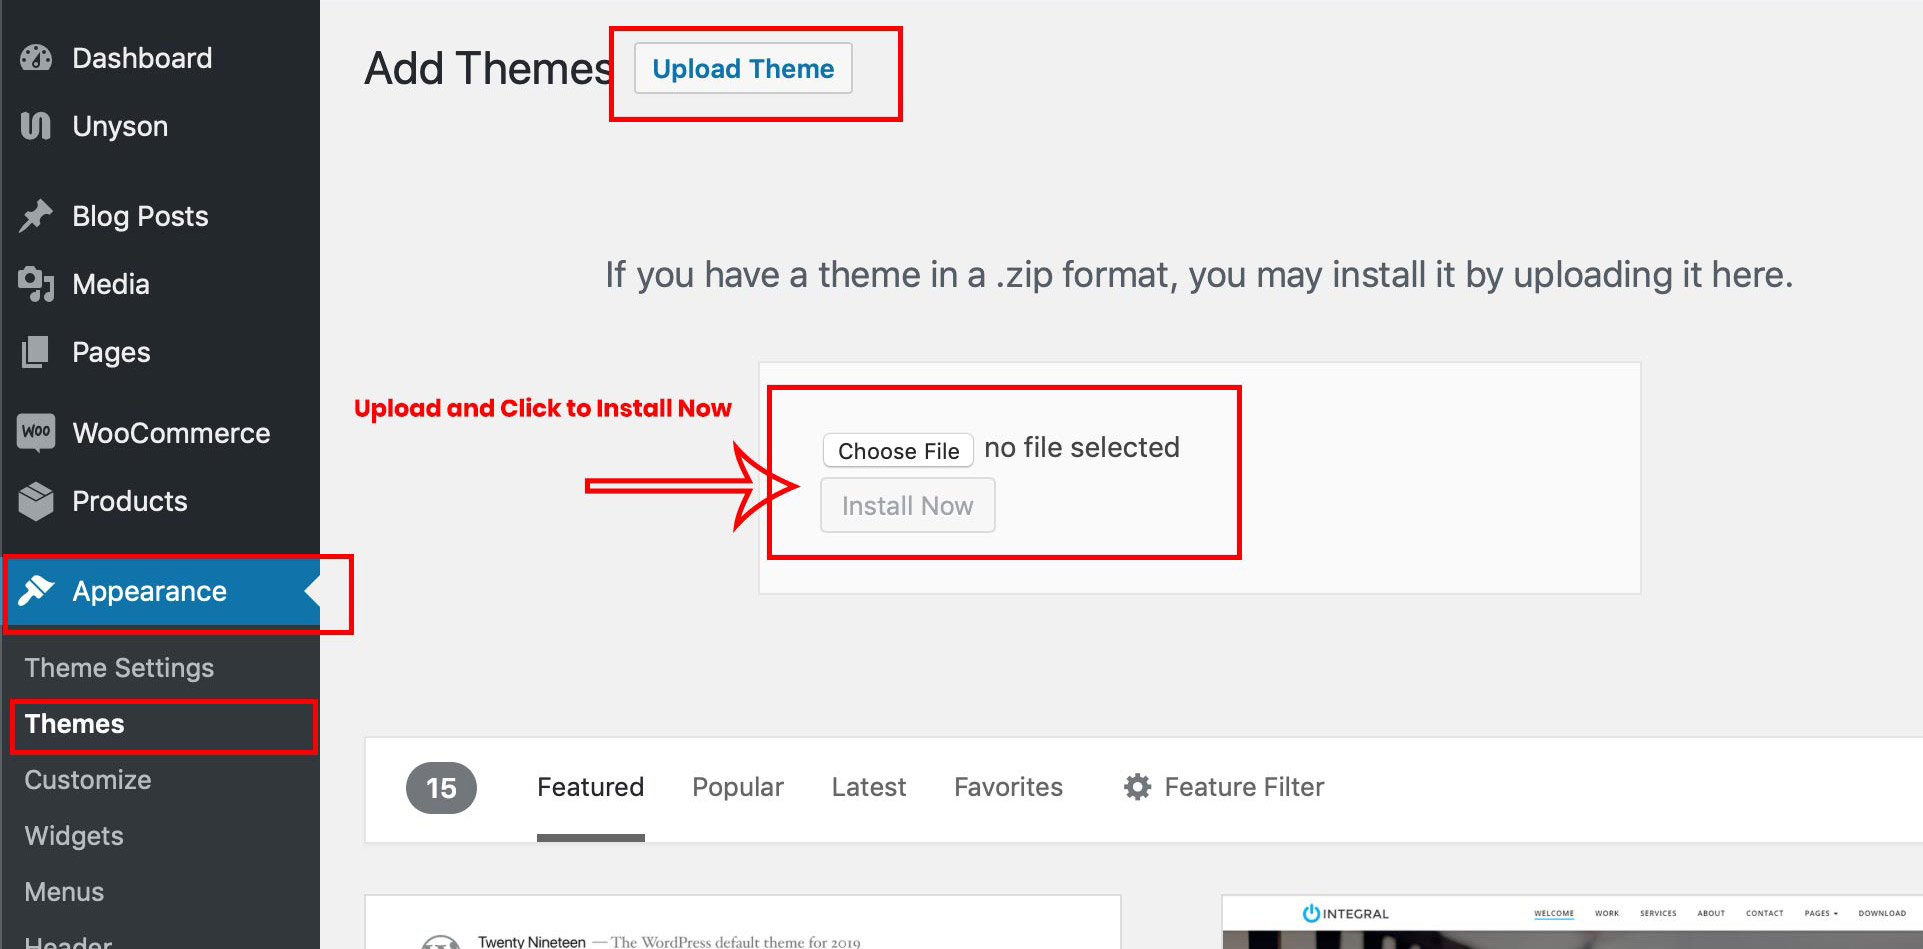
Step 1 – Navigate to Appearance > Themes.
Step 2 – Click Add New and click the Upload button. Navigate to find the “vultur.zip” file on your computer and click “Install Now”
NOTE: From 5th step onwards all the points are same for both installation method ie WP installation and FTP installation.
How To Install Vultur WordPress Theme! via FTP
Step 1 – Log into your hosting space via an FTP software.
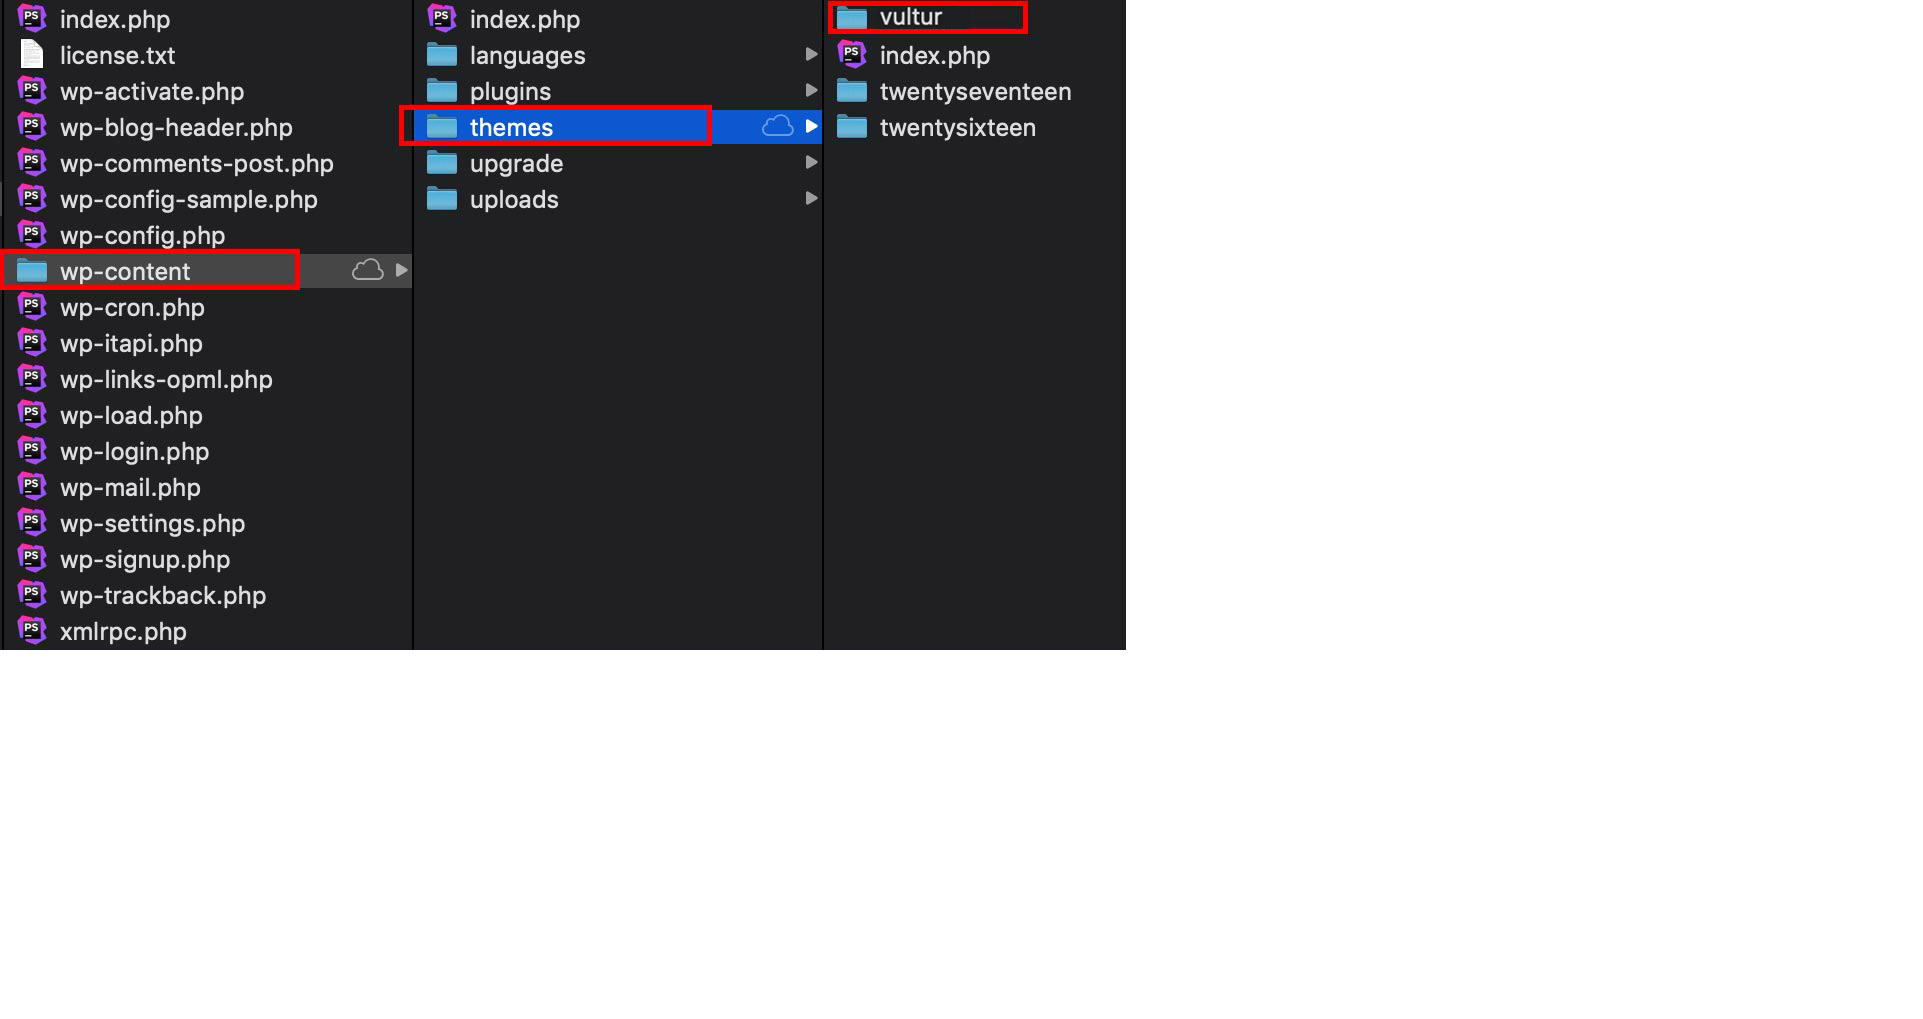
Step 2 – Unzip the vultur.zip file and only use the extracted Vultur theme folder.
Step 3 – Upload the extracted vultur theme folder into wp-content > themes folder.
Step 4 – Navigate to the wp-dashboard and then activate the newly installed theme by going to Appearance > Themes and clicking the Activate button.
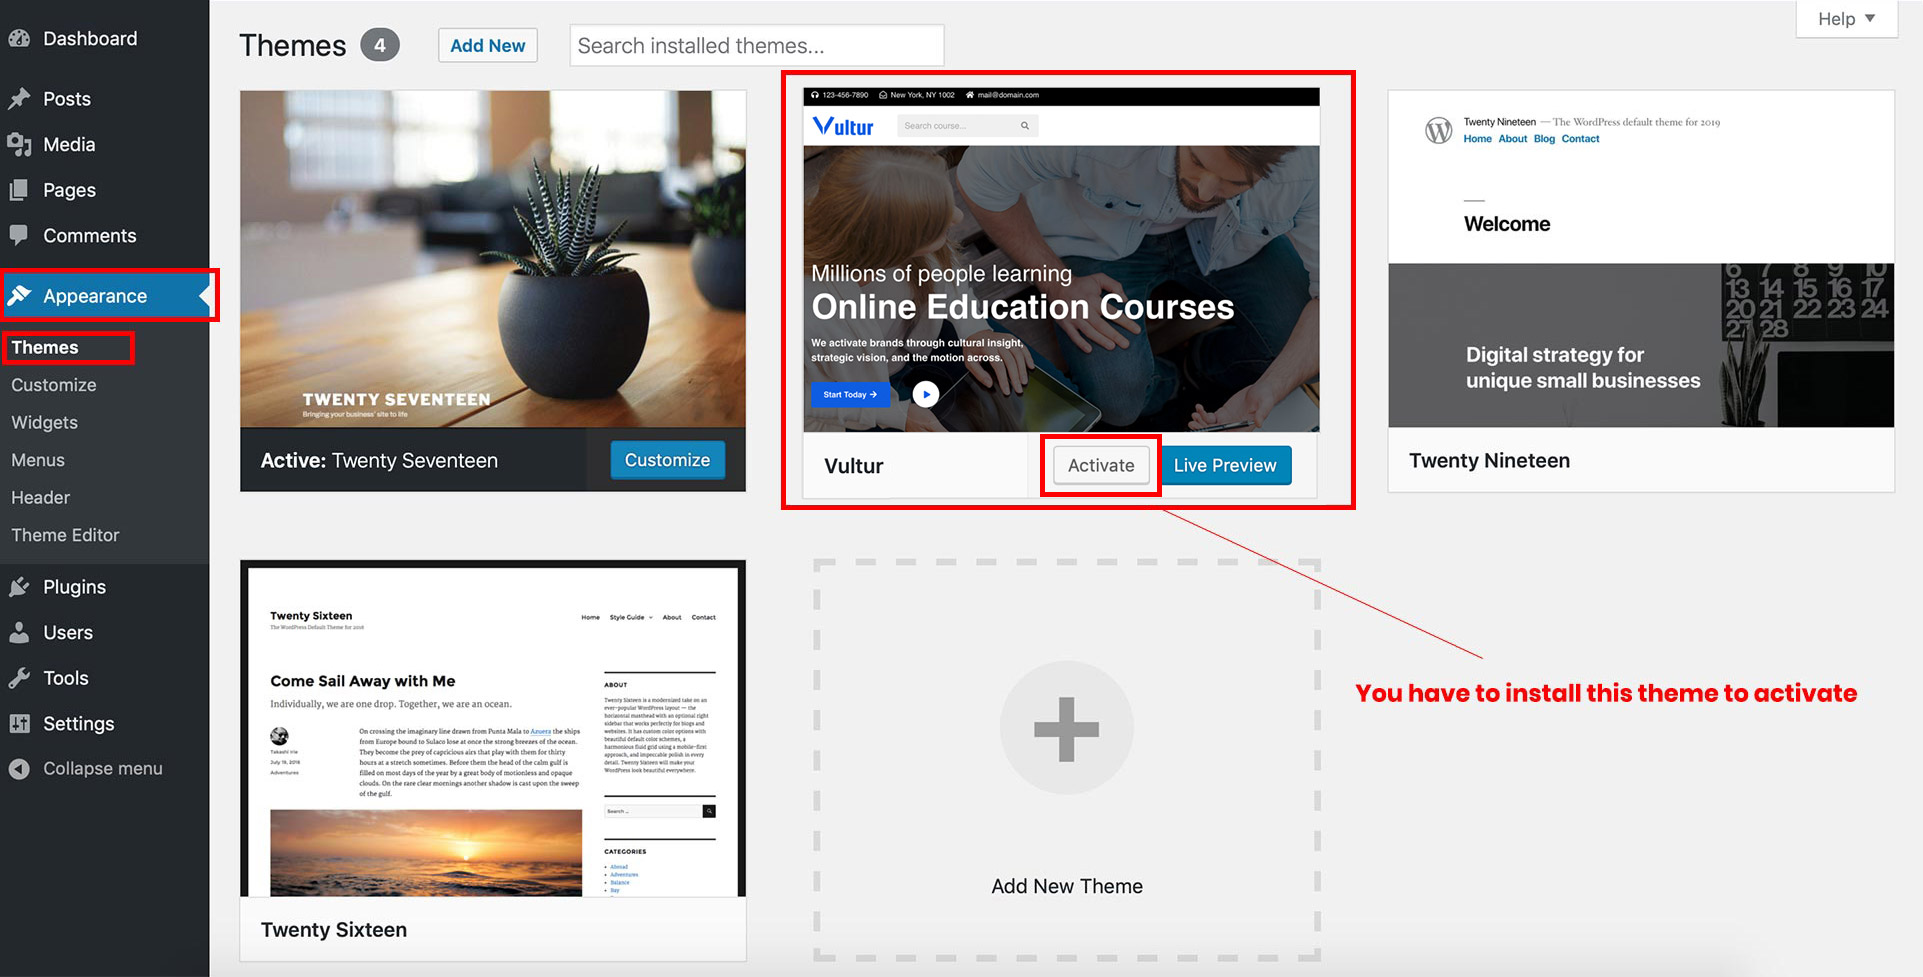
Step 5 – Once uploaded, activate the theme. Go to Appearance > Themes and activate it. Then you will see a notification message to activate the required & recommended plugins.
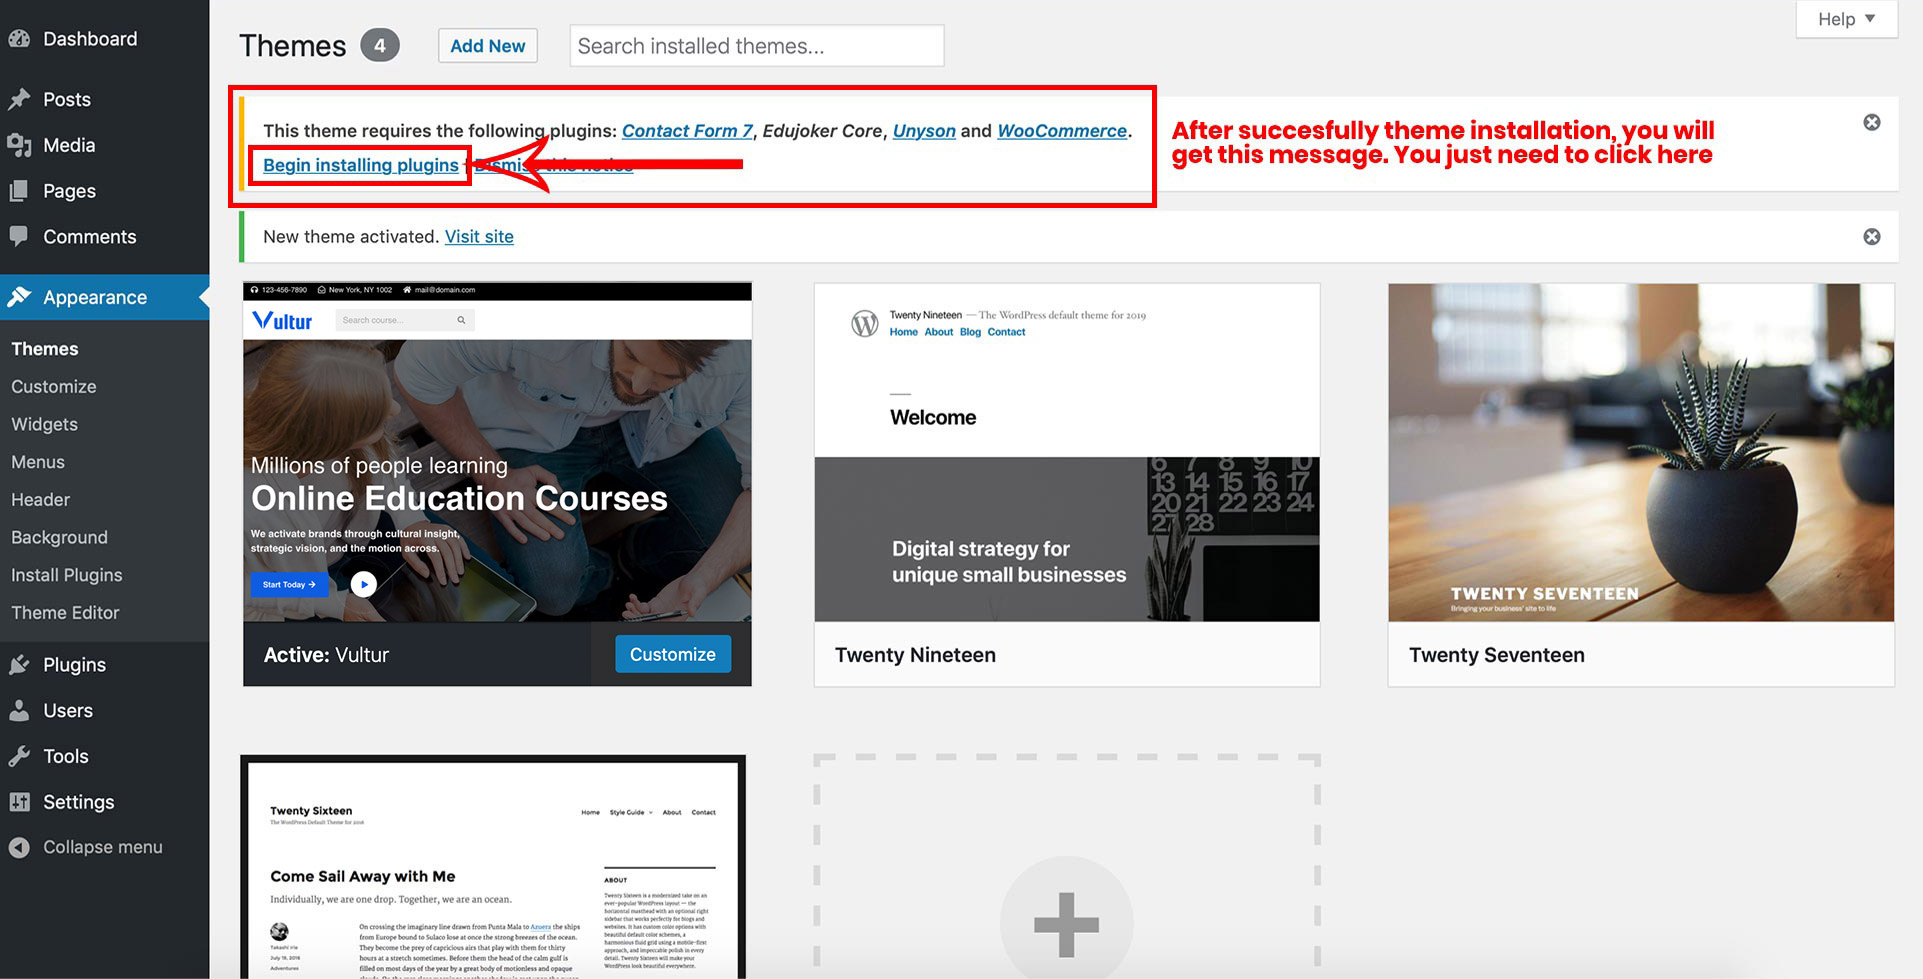
Step 6 – All plugins shown in screenshot are the required and recommended plugins. All the recommended plugins are the optional plugins.
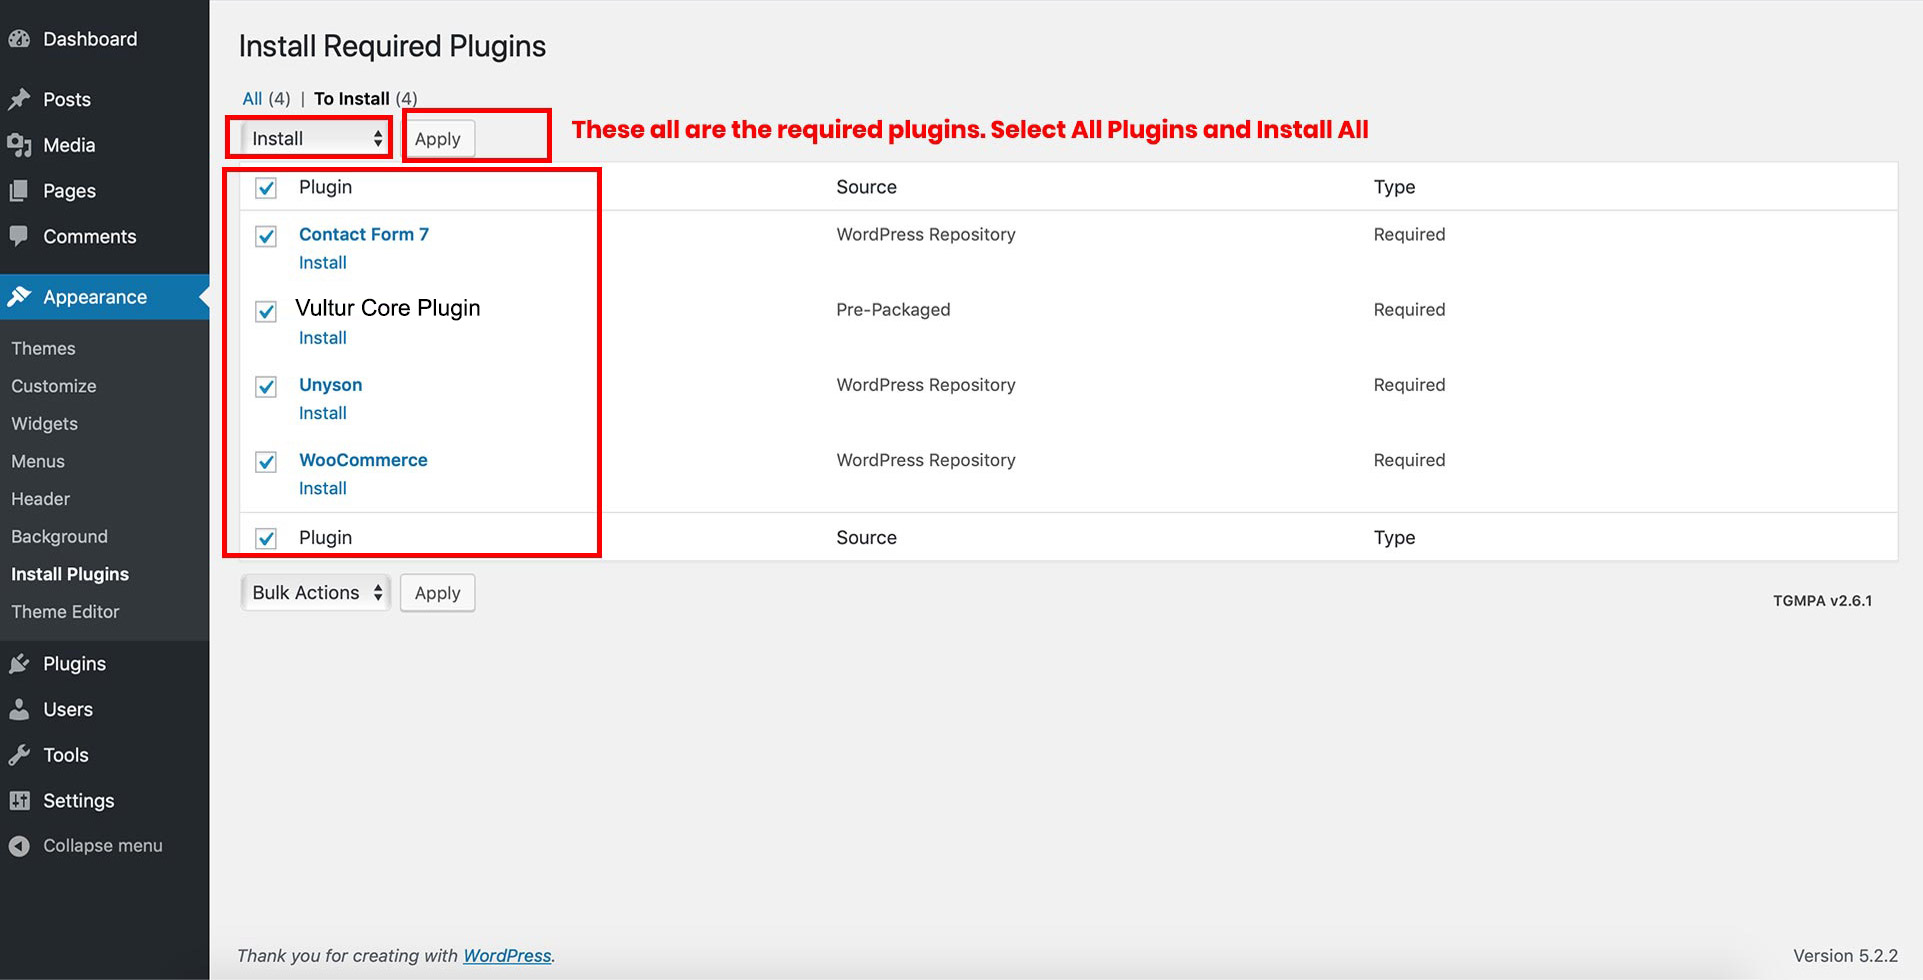
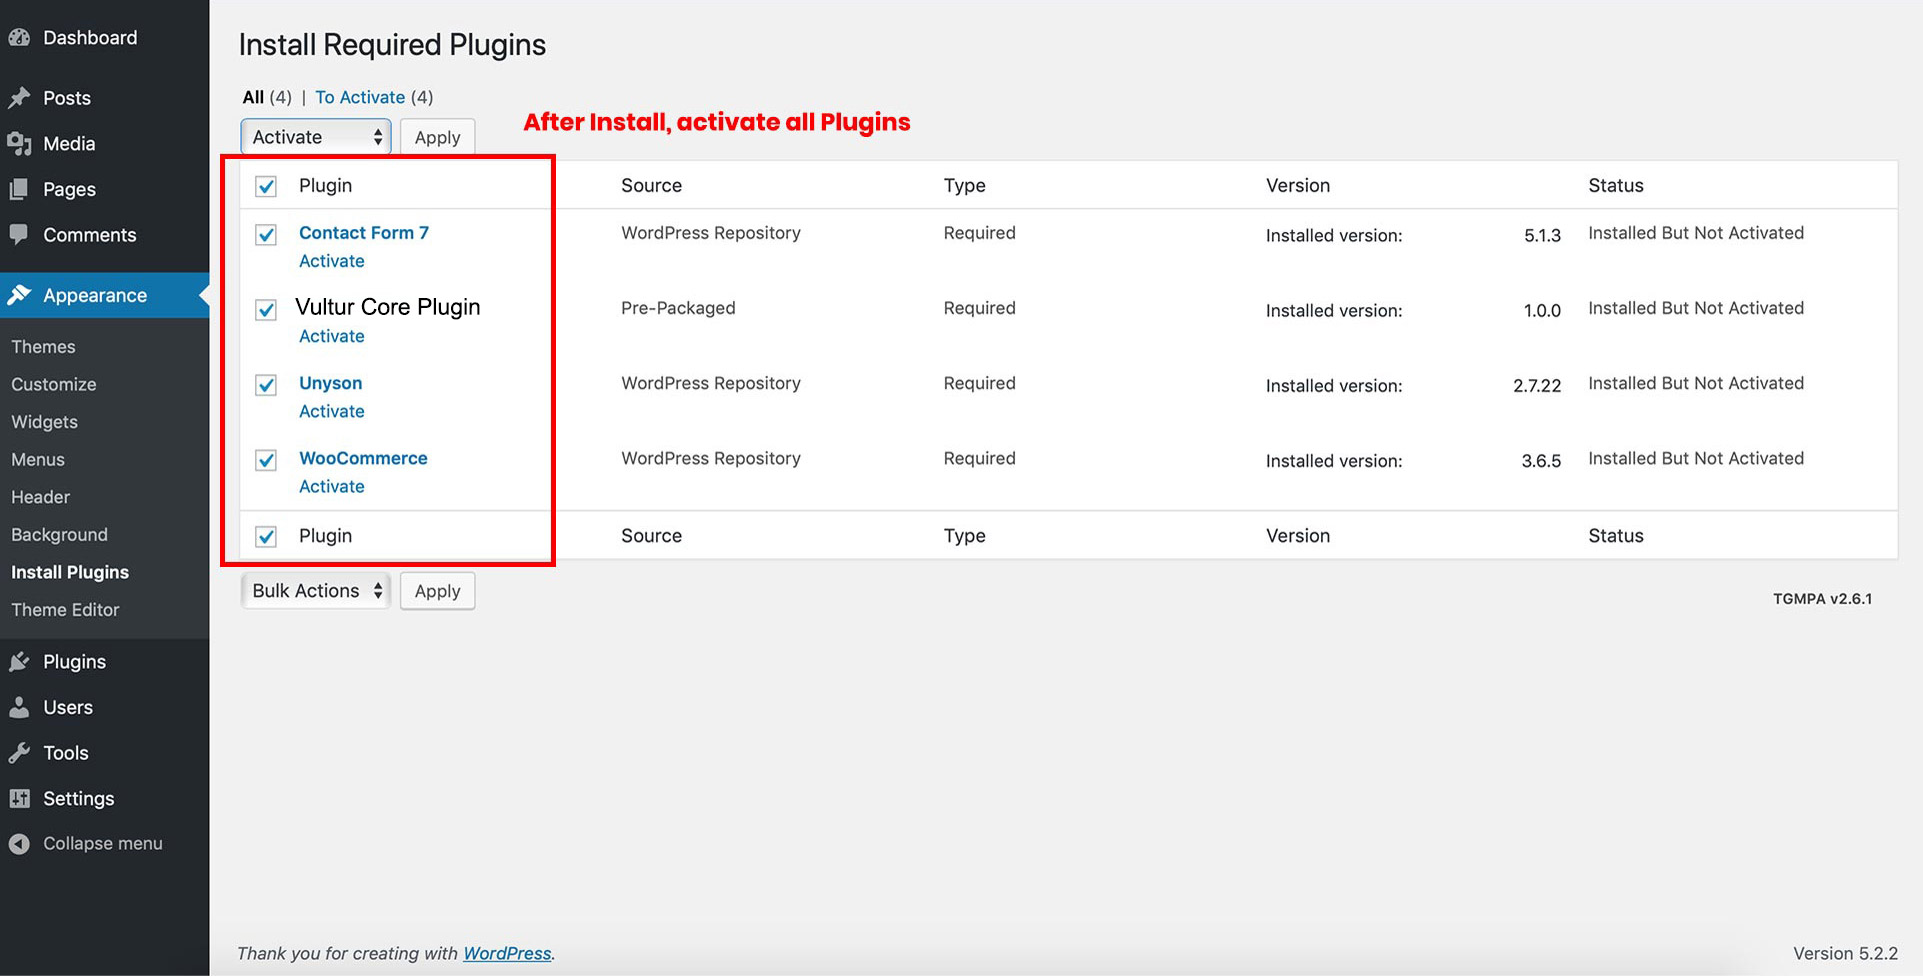
Plugins that will need to be installed and activated: Contact Form7, unyson, , Vultur core plugin are required for the theme to work, it contains all of our theme features like shortcodes and shortcode.
1. Unyson – This is our companion plugin that is required to use Vultur WordPress Theme. Please make sure this is always installed and activated.
3. ContactForm 7 – Contact Form 7 can manage multiple contact forms, plus you can customize the form and the mail contents flexibly with simple markup.
4. Vultur Core Plugin – Feature your skills and talent by showcasing the samples of your Website designs, artwork and more in the portfolio section of this WordPress Theme. You can leave a digital footprint of yours while showcasing your skills and expertise on the online search platform such as Google and Bing.
6. WooCommerce Plugin – WooCommerce is a an eCommerce plugin that allows you to sell anything, beautifully. Built to integrate seamlessly with WordPress, WooCommerce is the world’s favorite eCommerce solution that gives both store owners and developers complete control.
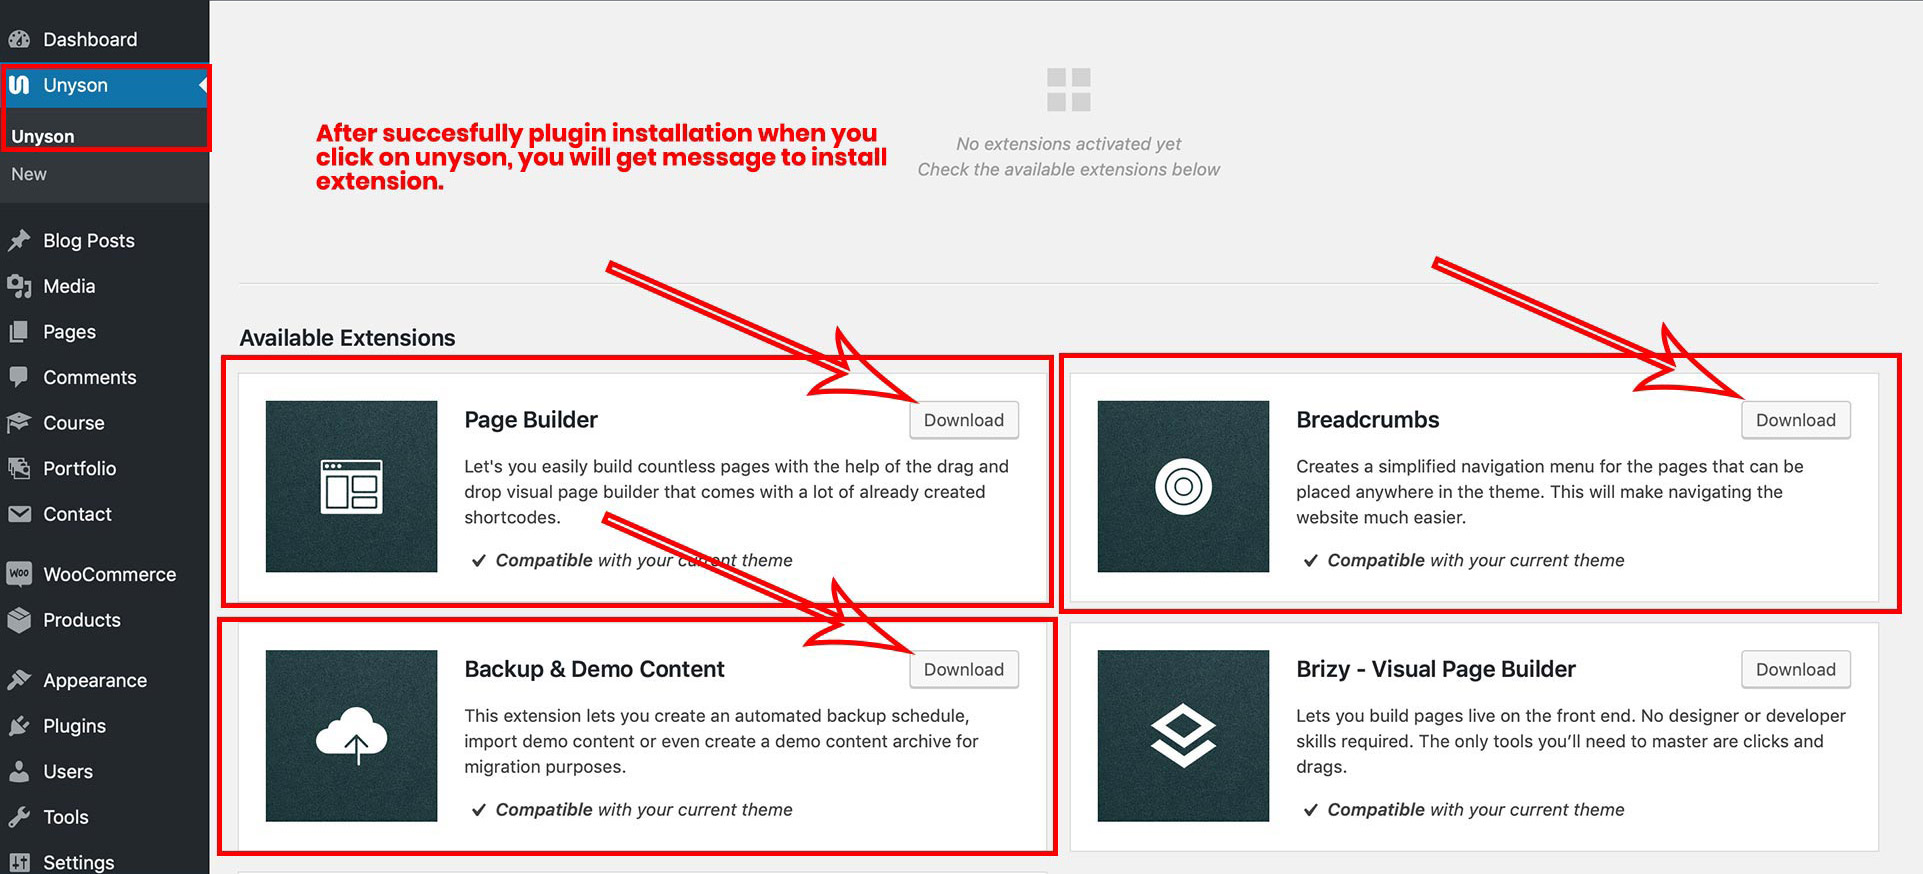
Step 7 - With purchased theme you will get 2 extensions, activate all the extenions.
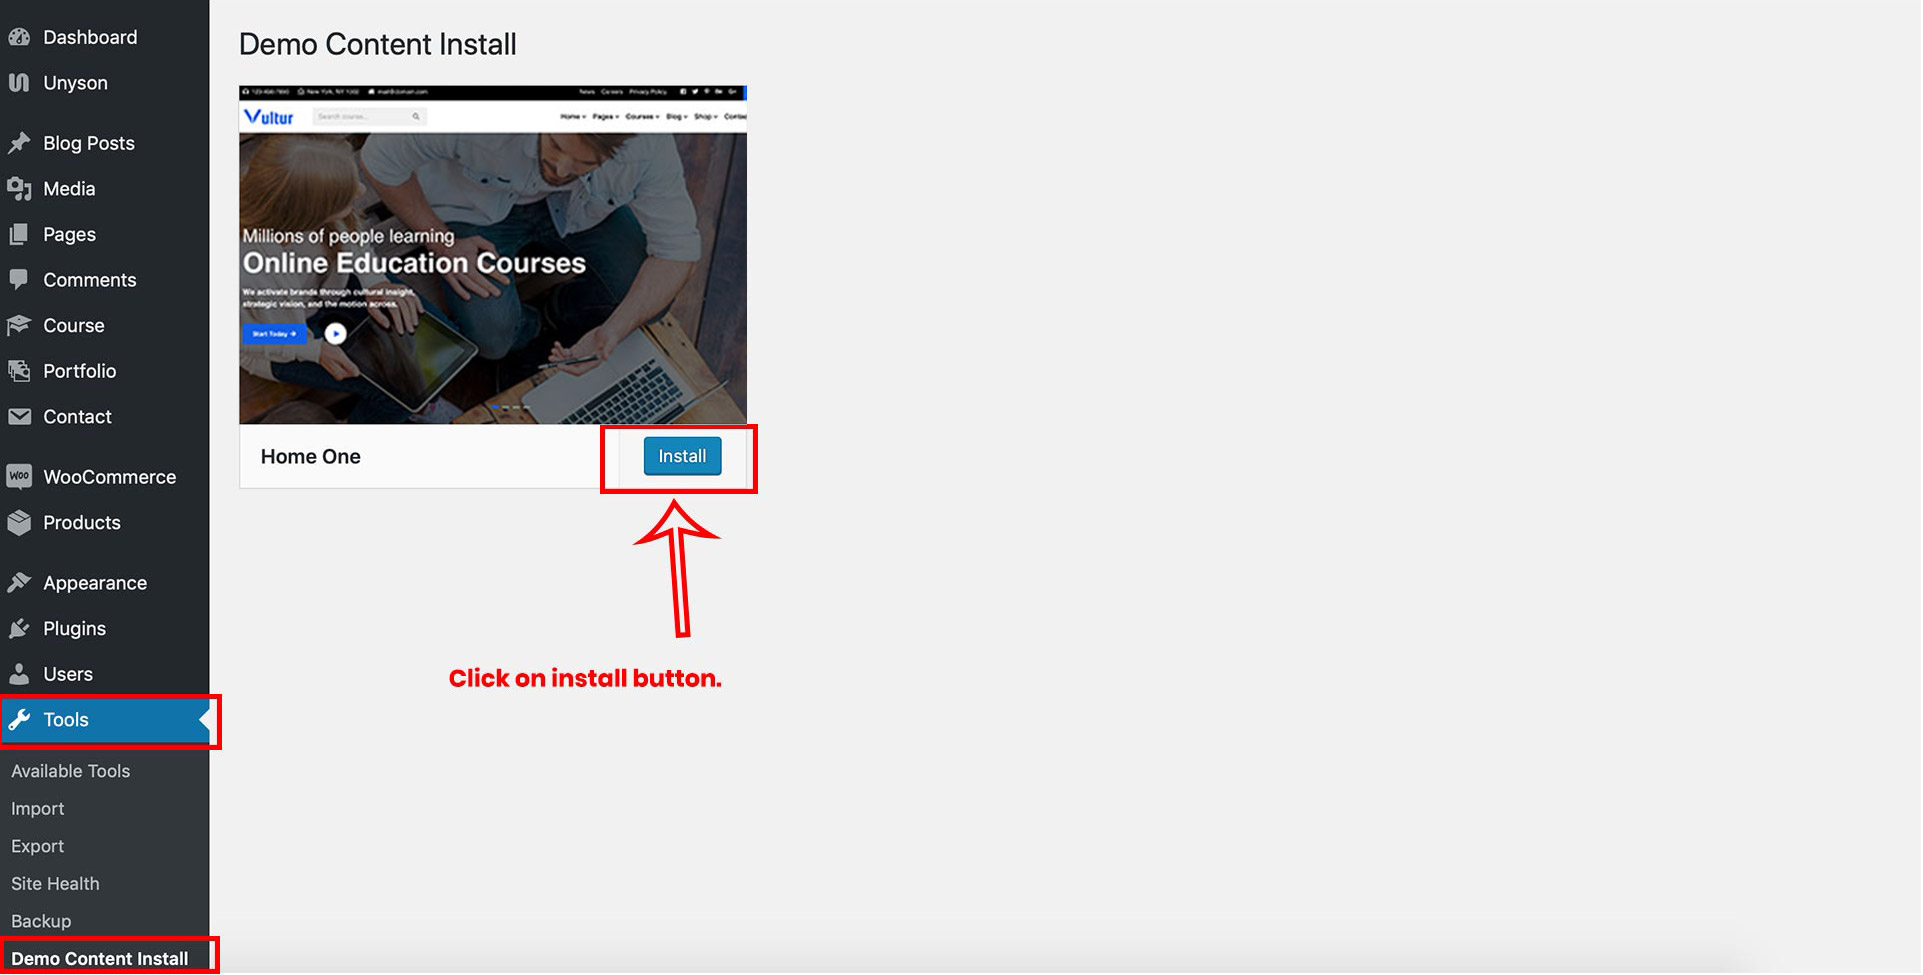
Step 8 - Navigate to Tools > Demo Content Install. Click on install option as shown in image and enjoy the theme.
The various options provided by Theme Settings are as follows:
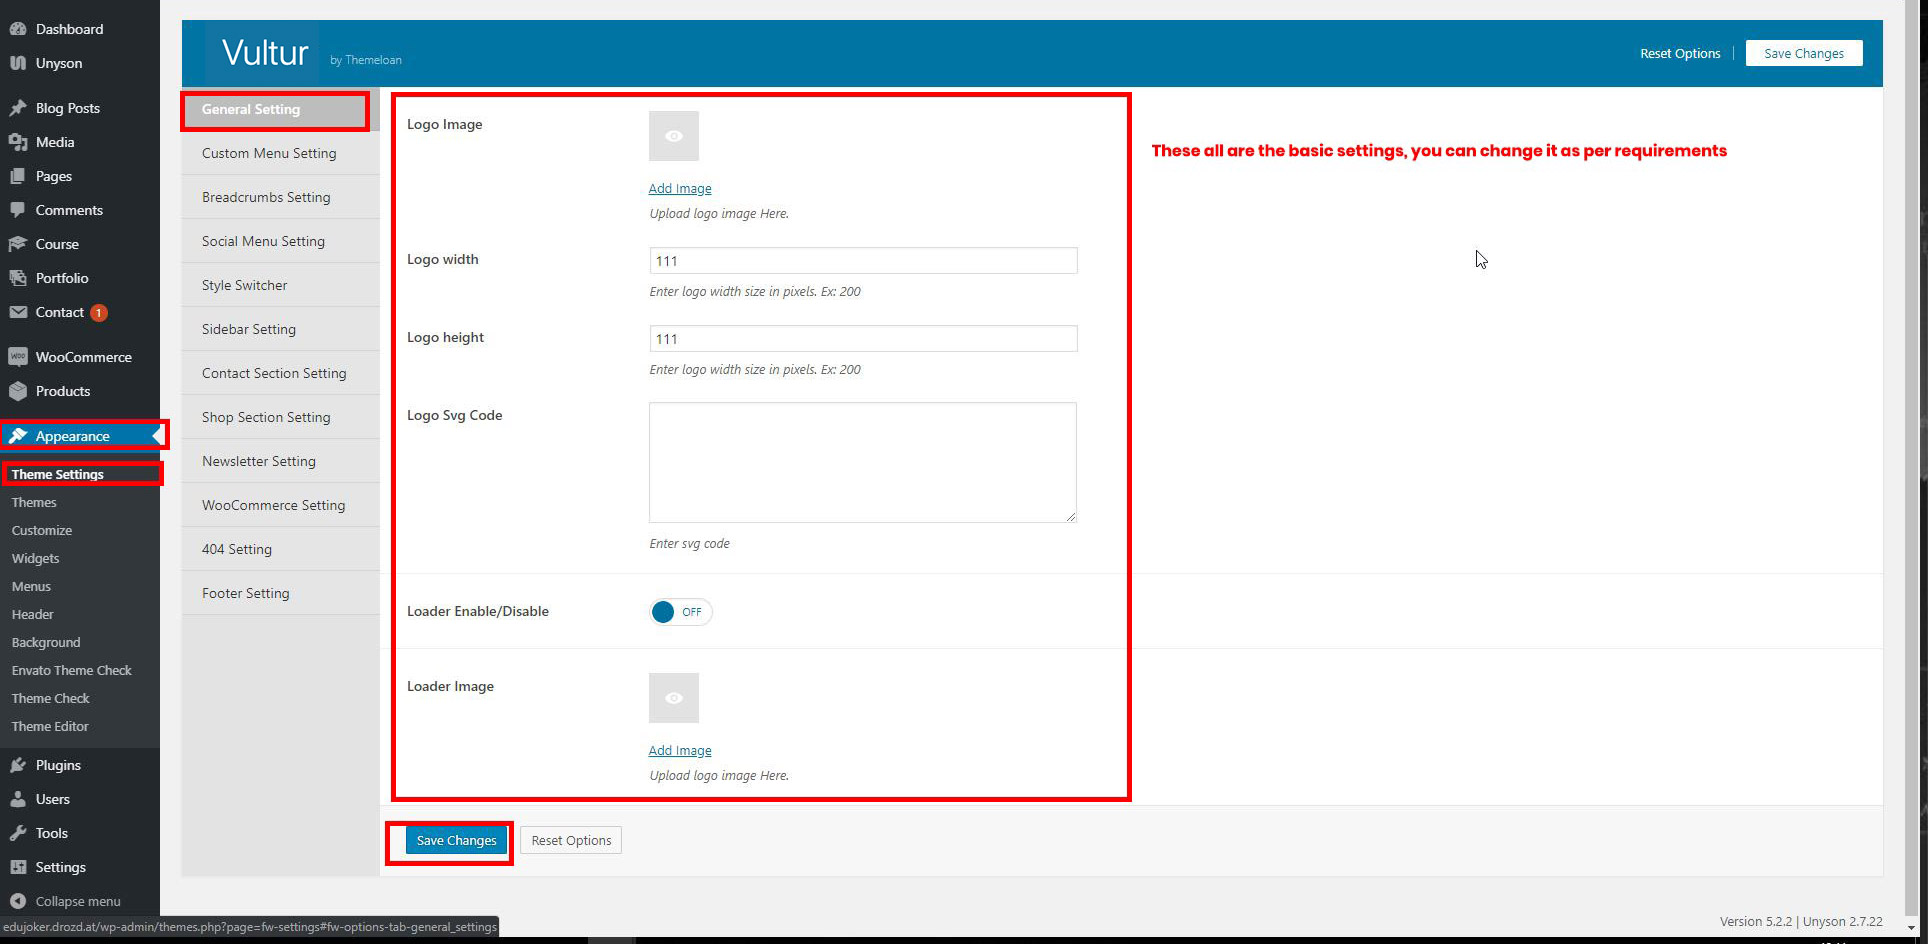
Navigate to appearance > Theme Settings
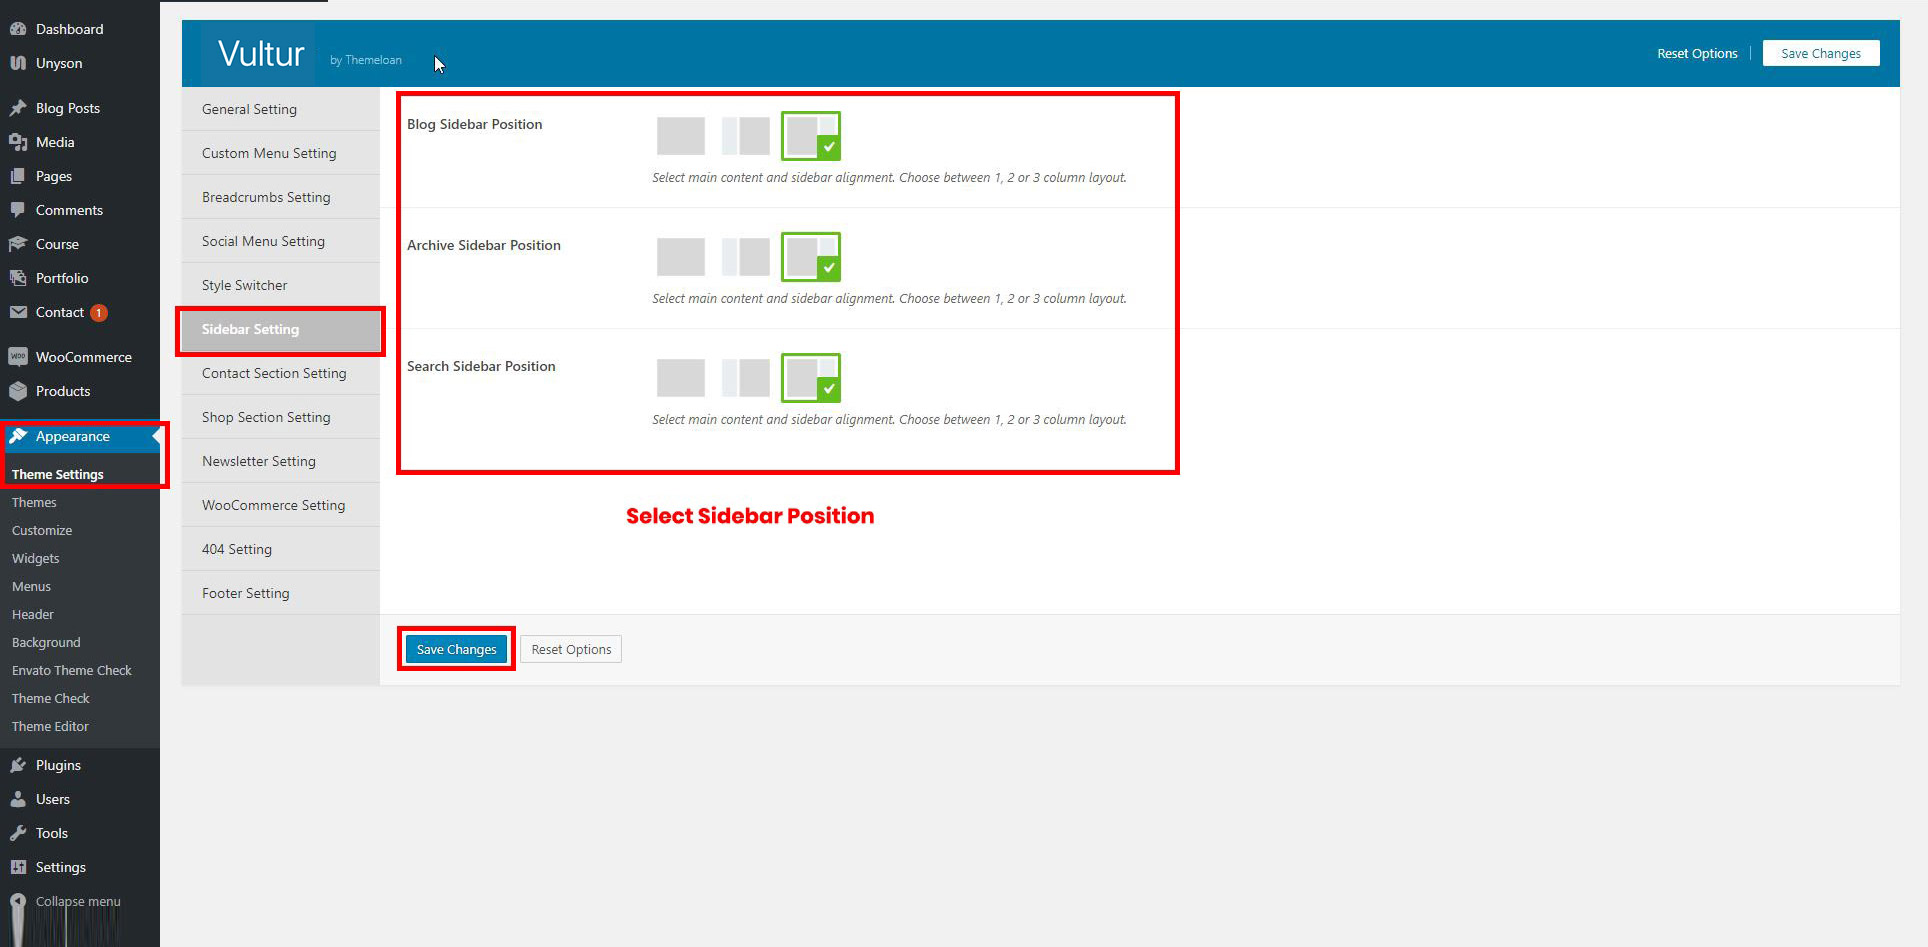
General settings consist of favicon logo and loader logo and sidebar positions.
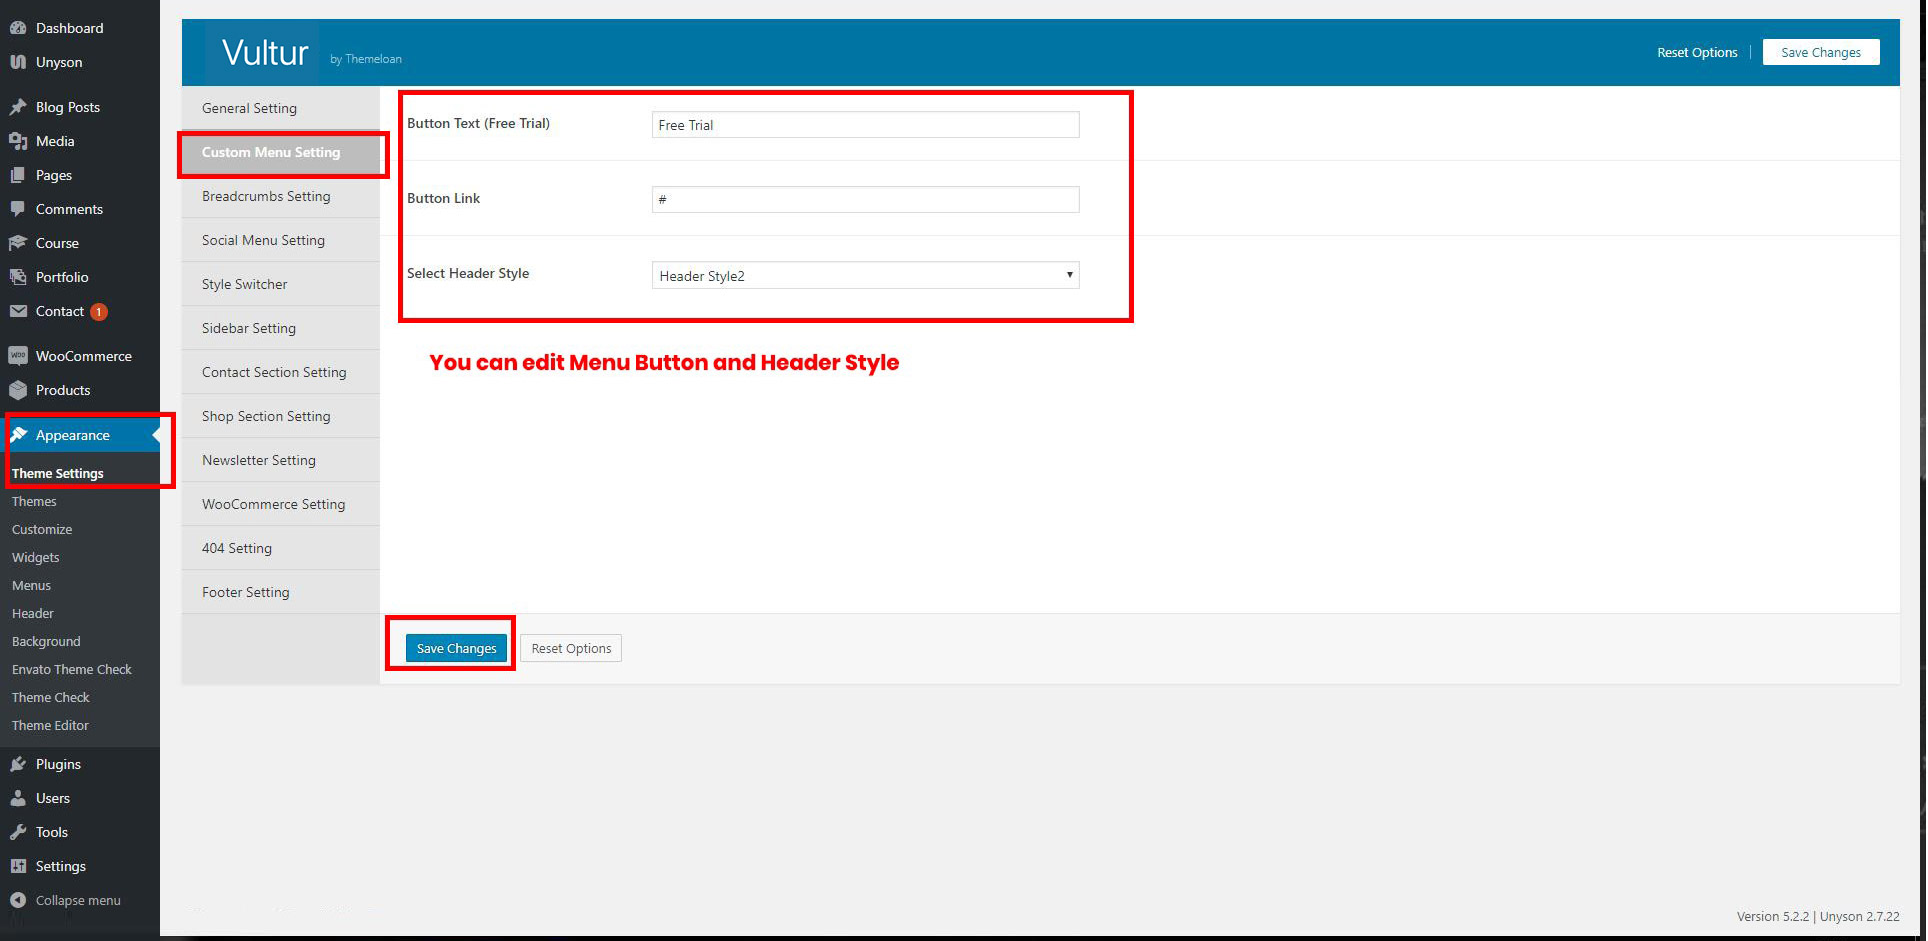
Custom Menu settings consist of the Home page for boxed layout.
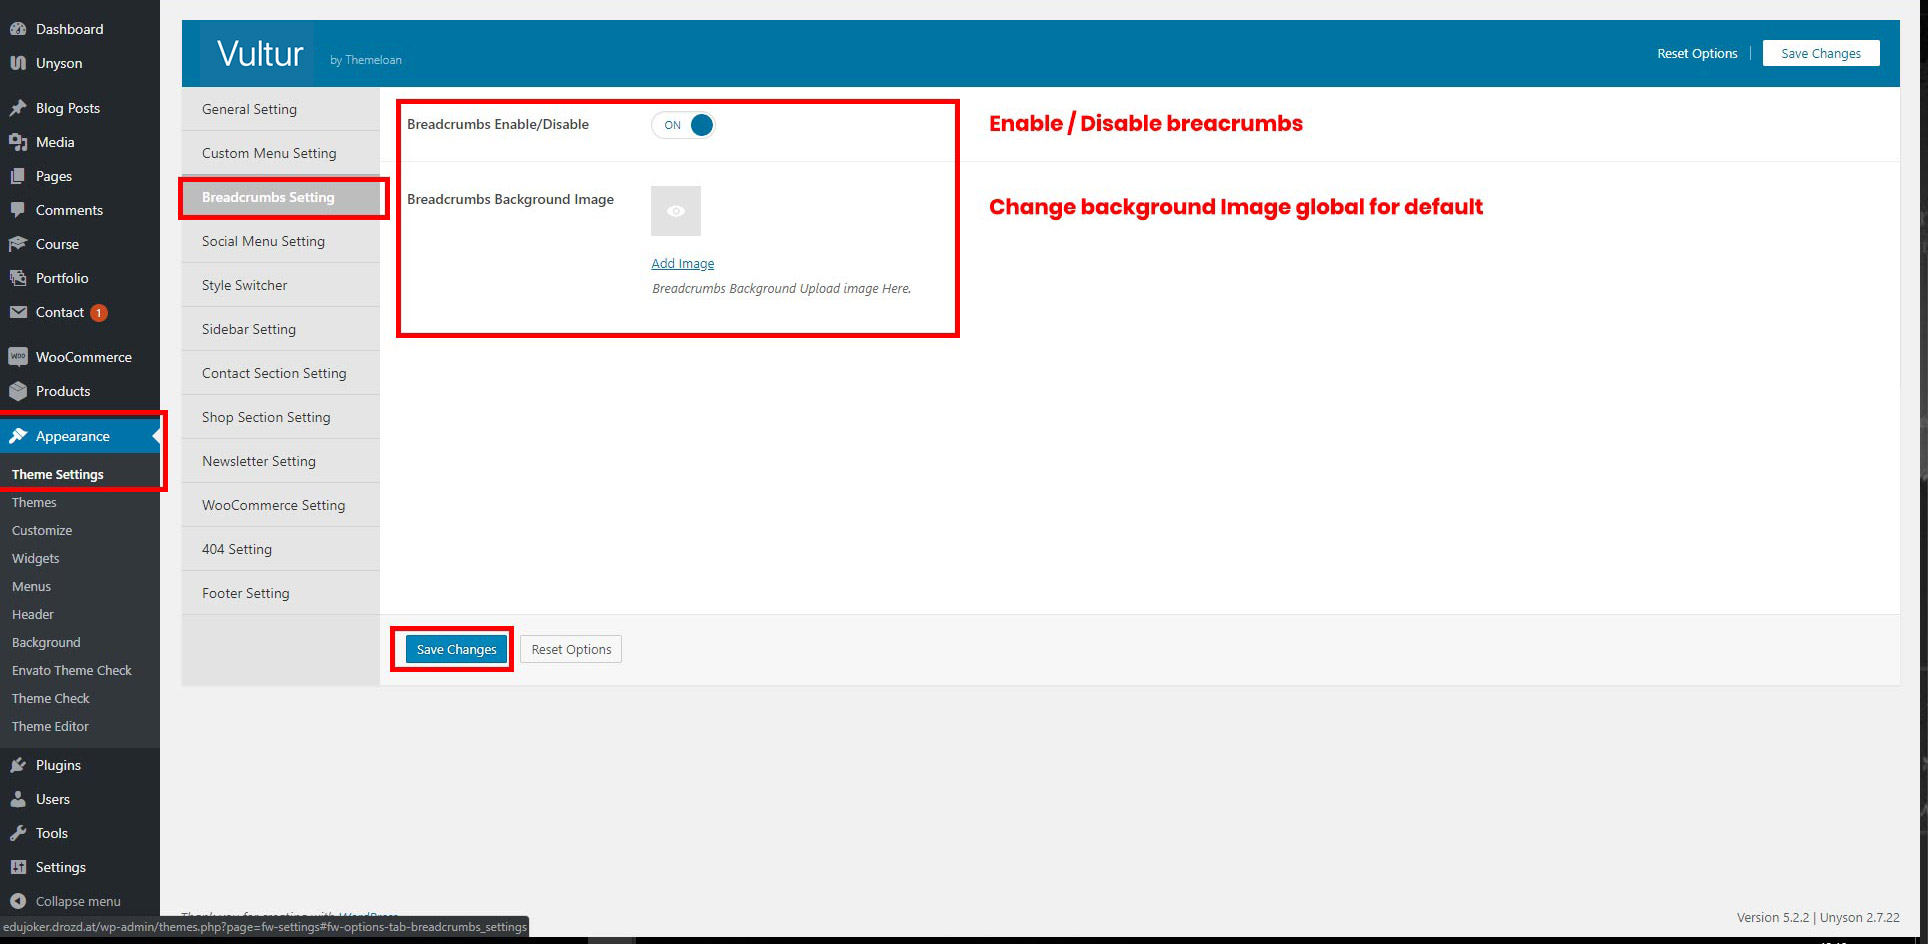
It consists of breadcrumb enable / disable button option and upload image option.
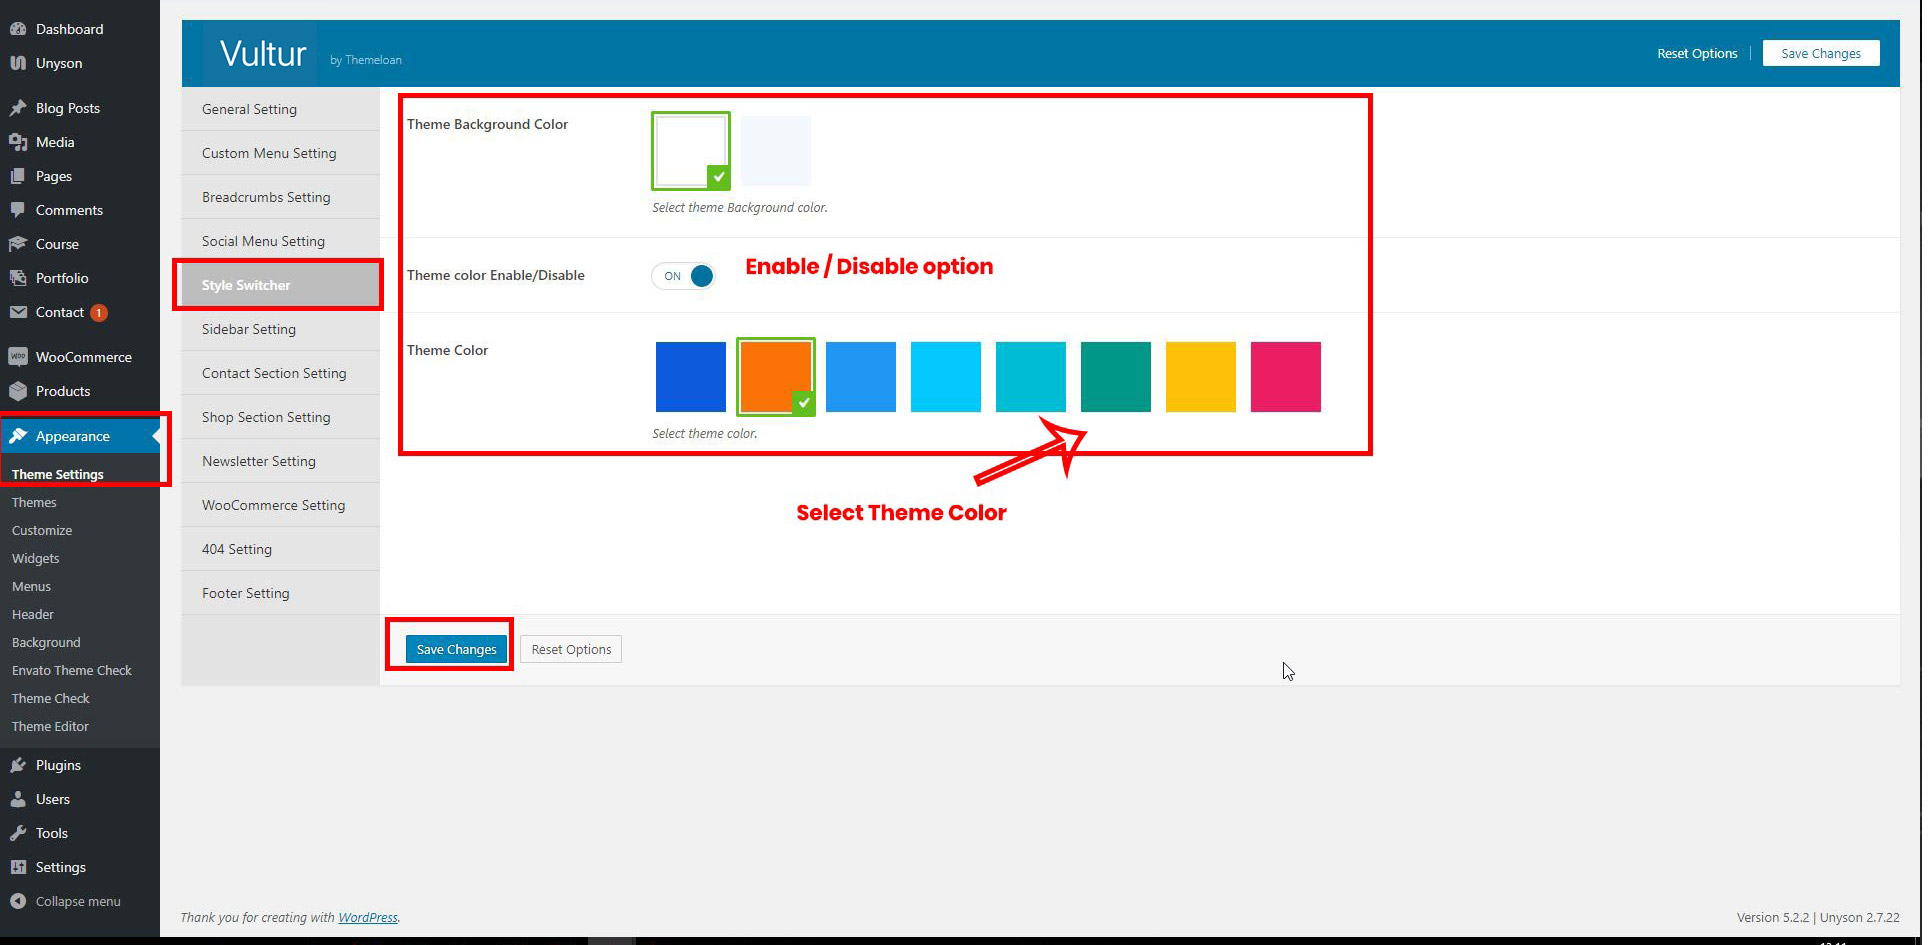
User can slide style switcher button for the frontend.
Social Menu setting consist of all social icons that can be show in menu.
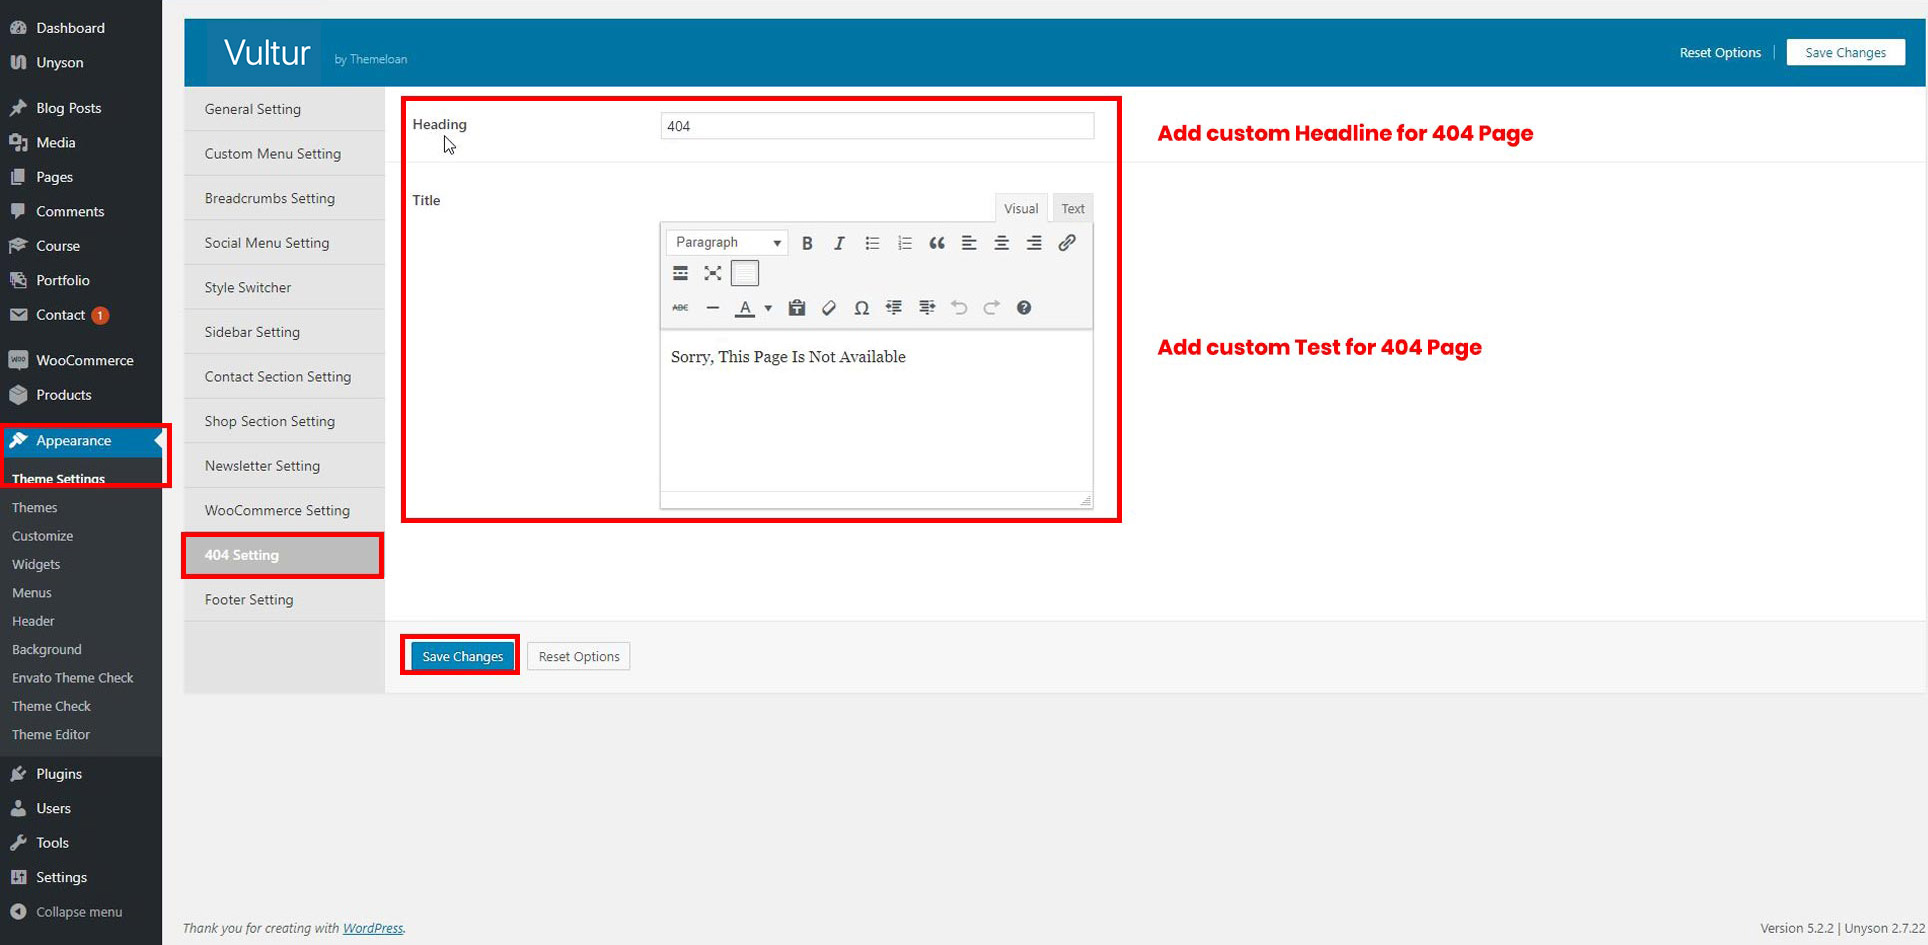
This setting redirect user to not found page, if the url incorrects.
General settings sidebar positions.
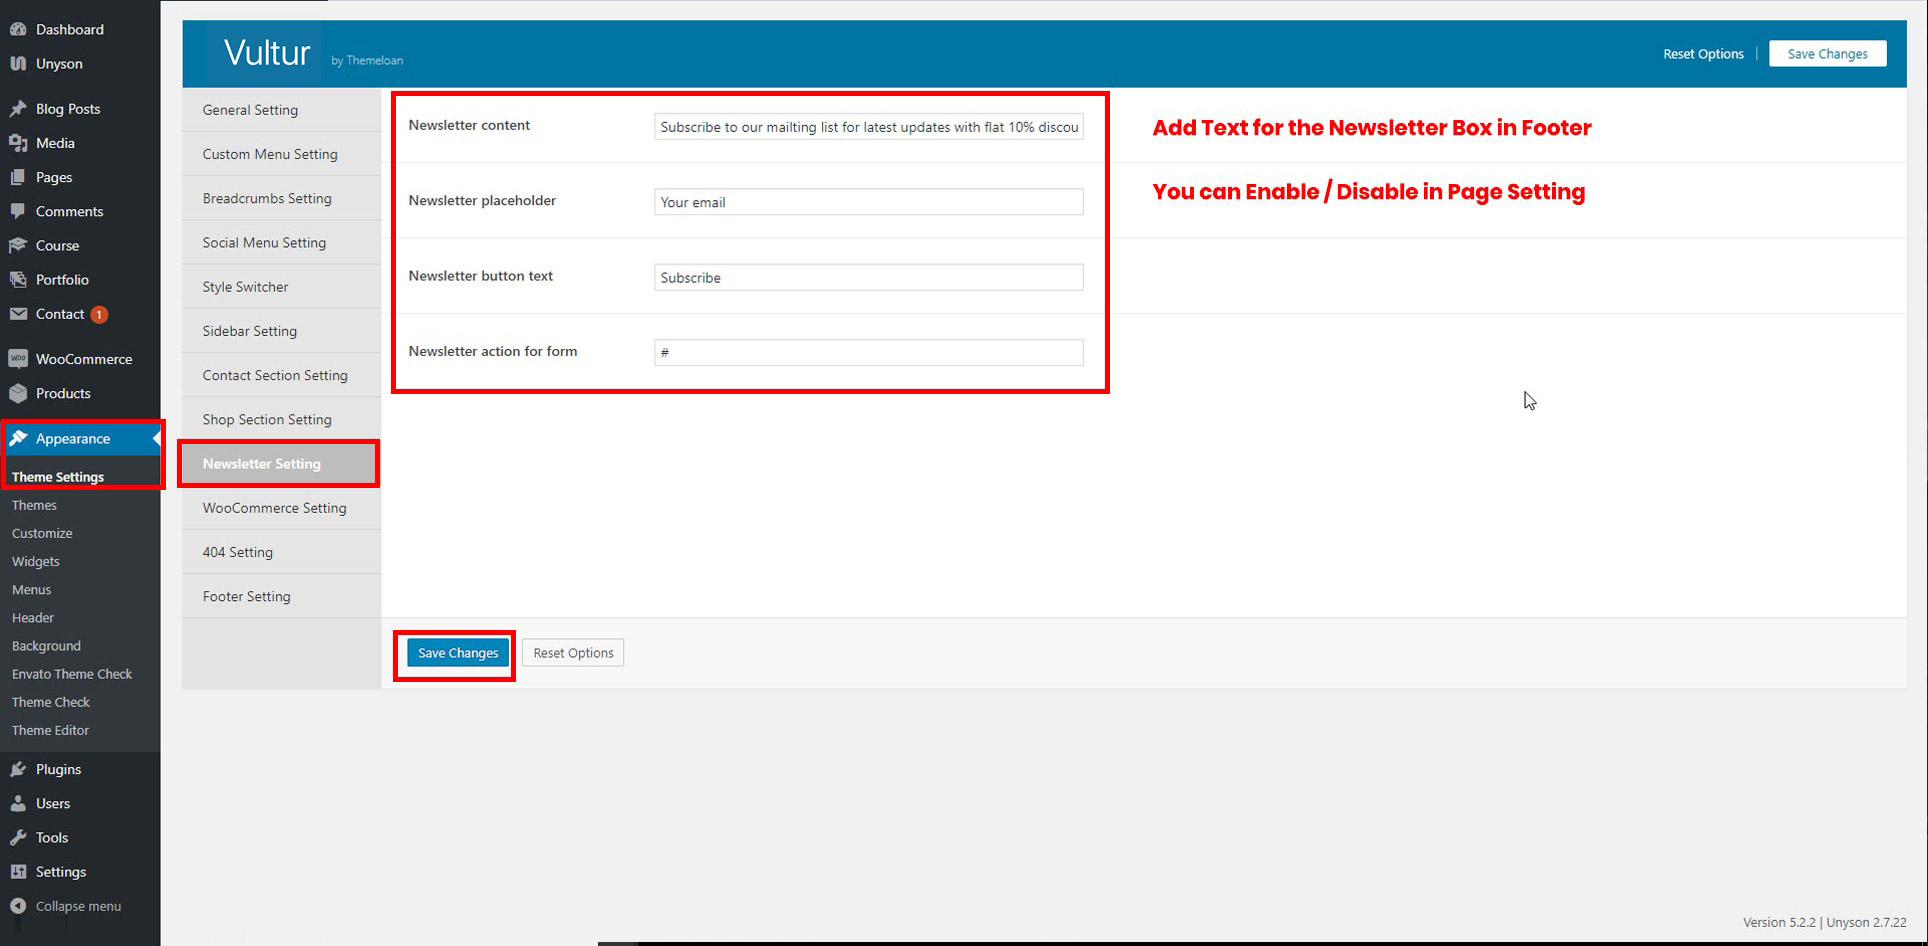
Newsletter settings consist of favicon logo and loader logo and sidebar positions.
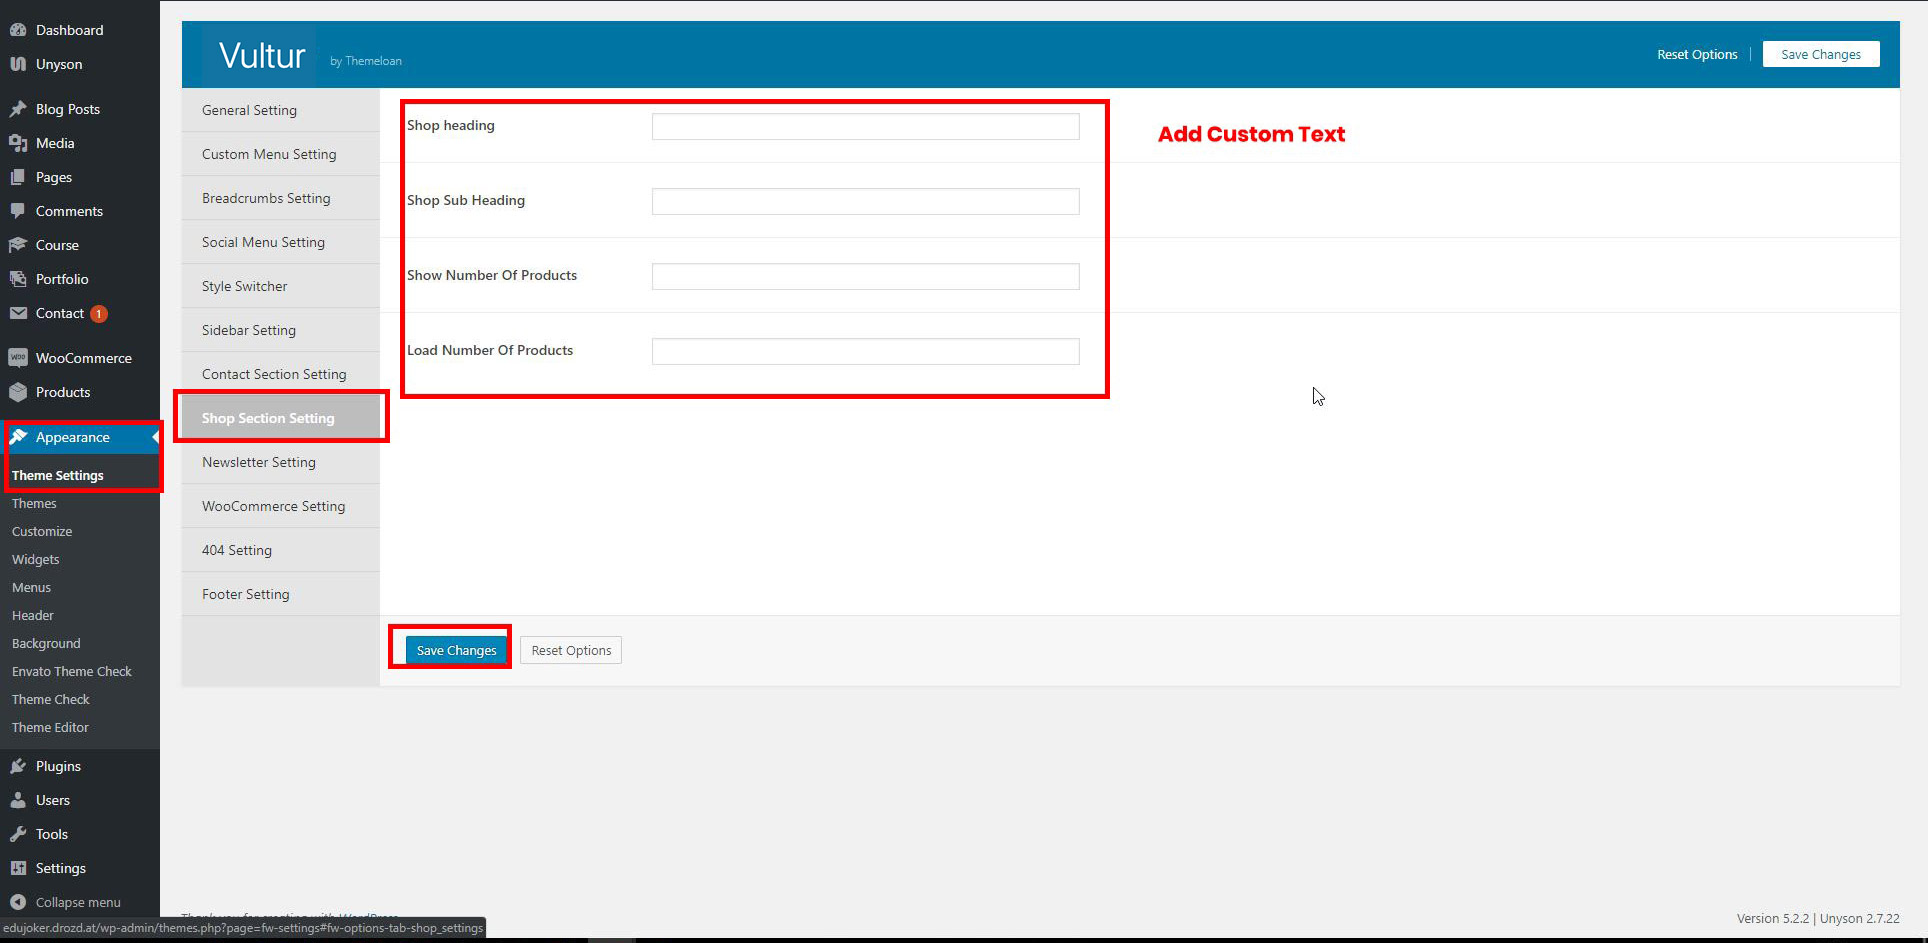
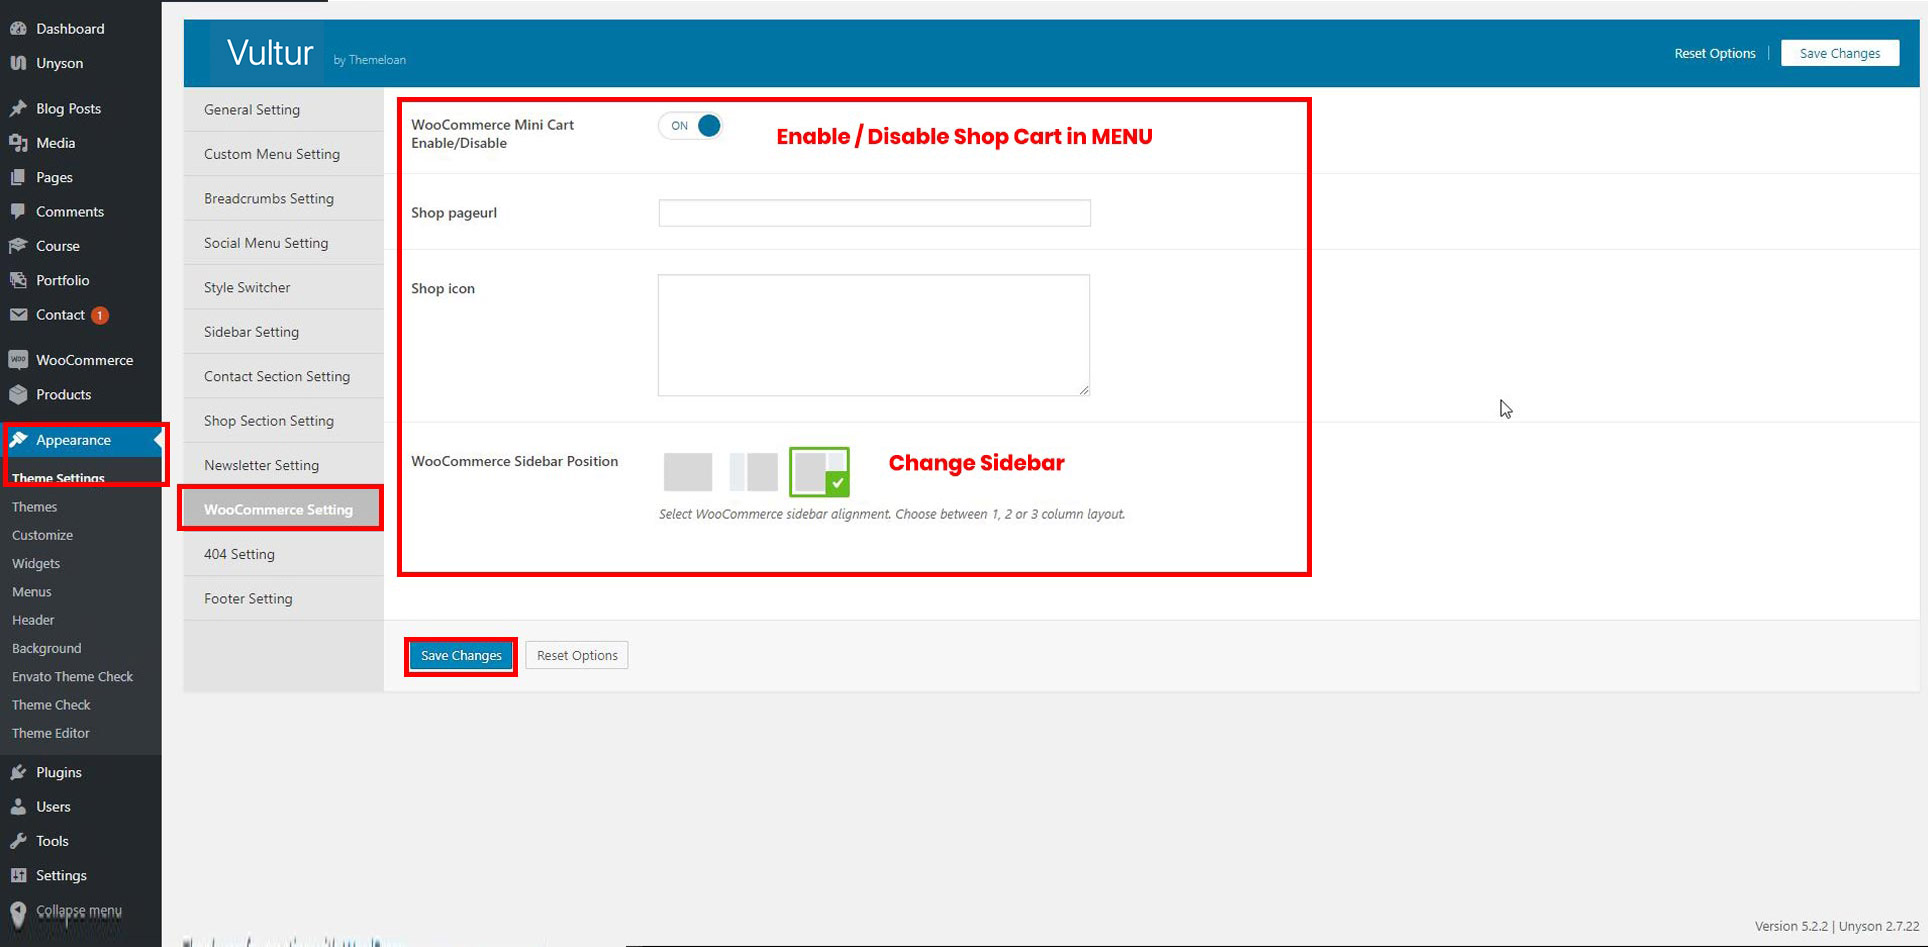
General settings for WooCommerce Shop. It consists of Shop Icon Menu enable / disable button option.
This setting redirect user to not found page, if the url incorrects.
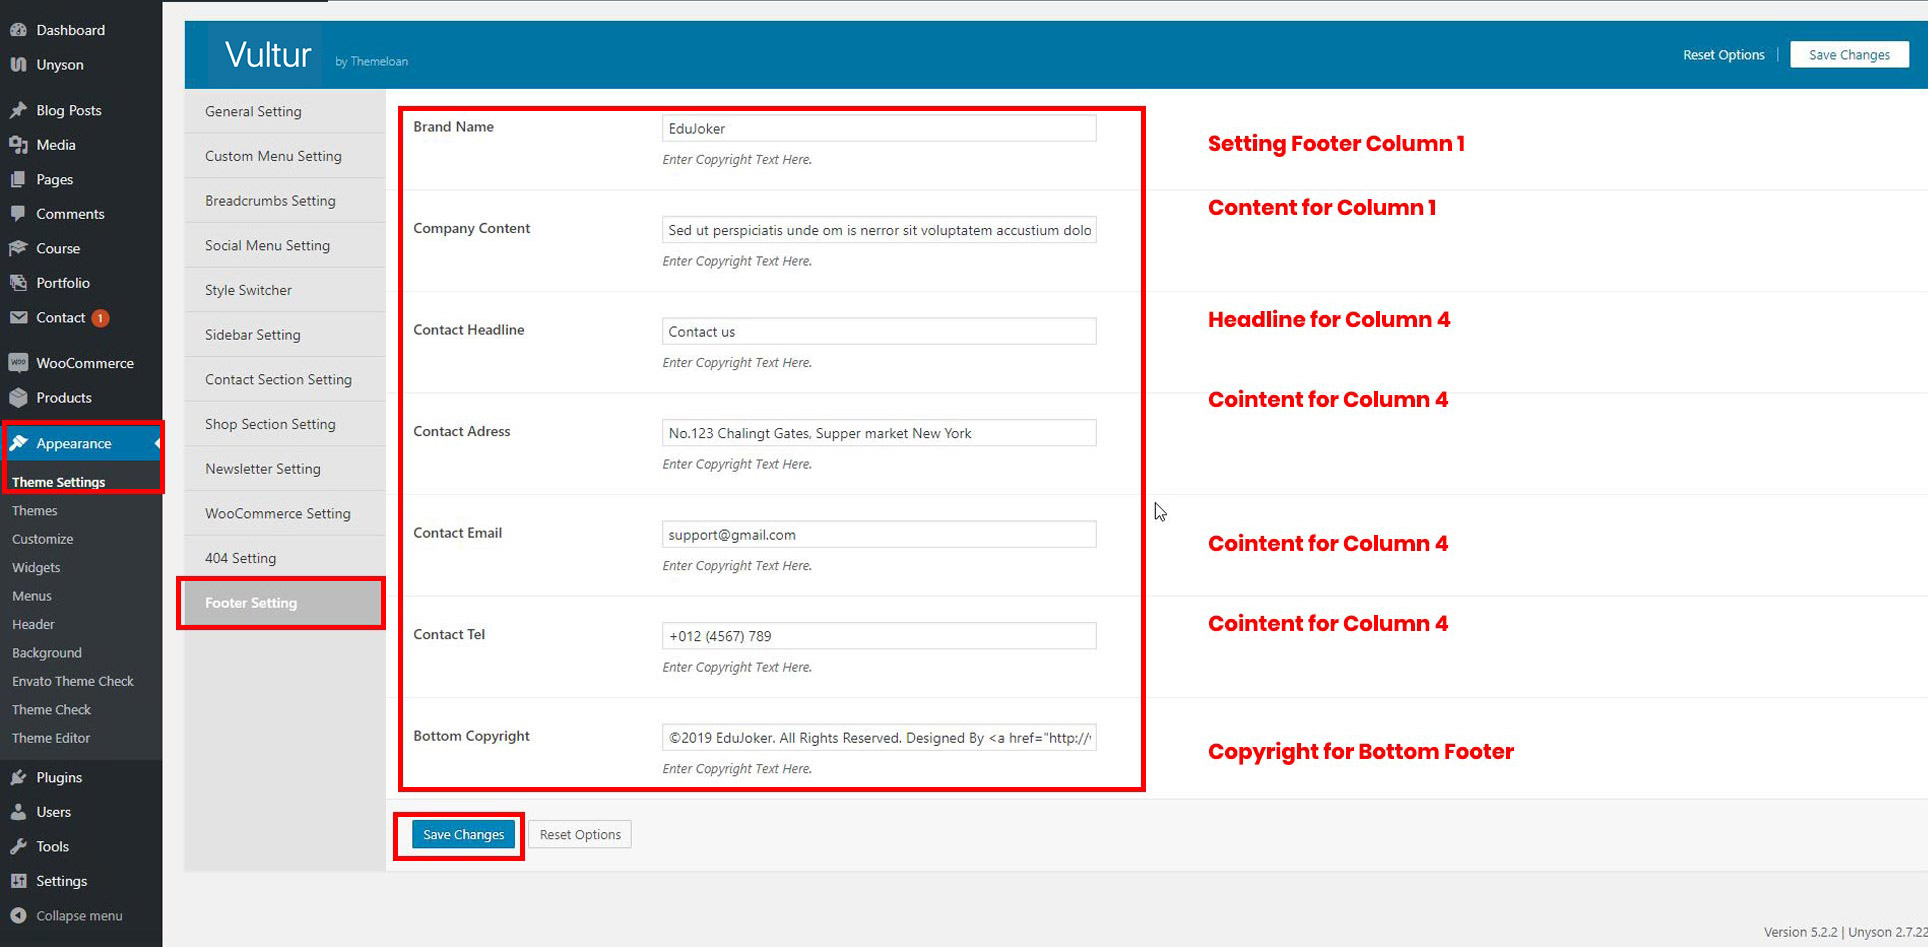
Footer settings, Company Content, Contact & Widgets.
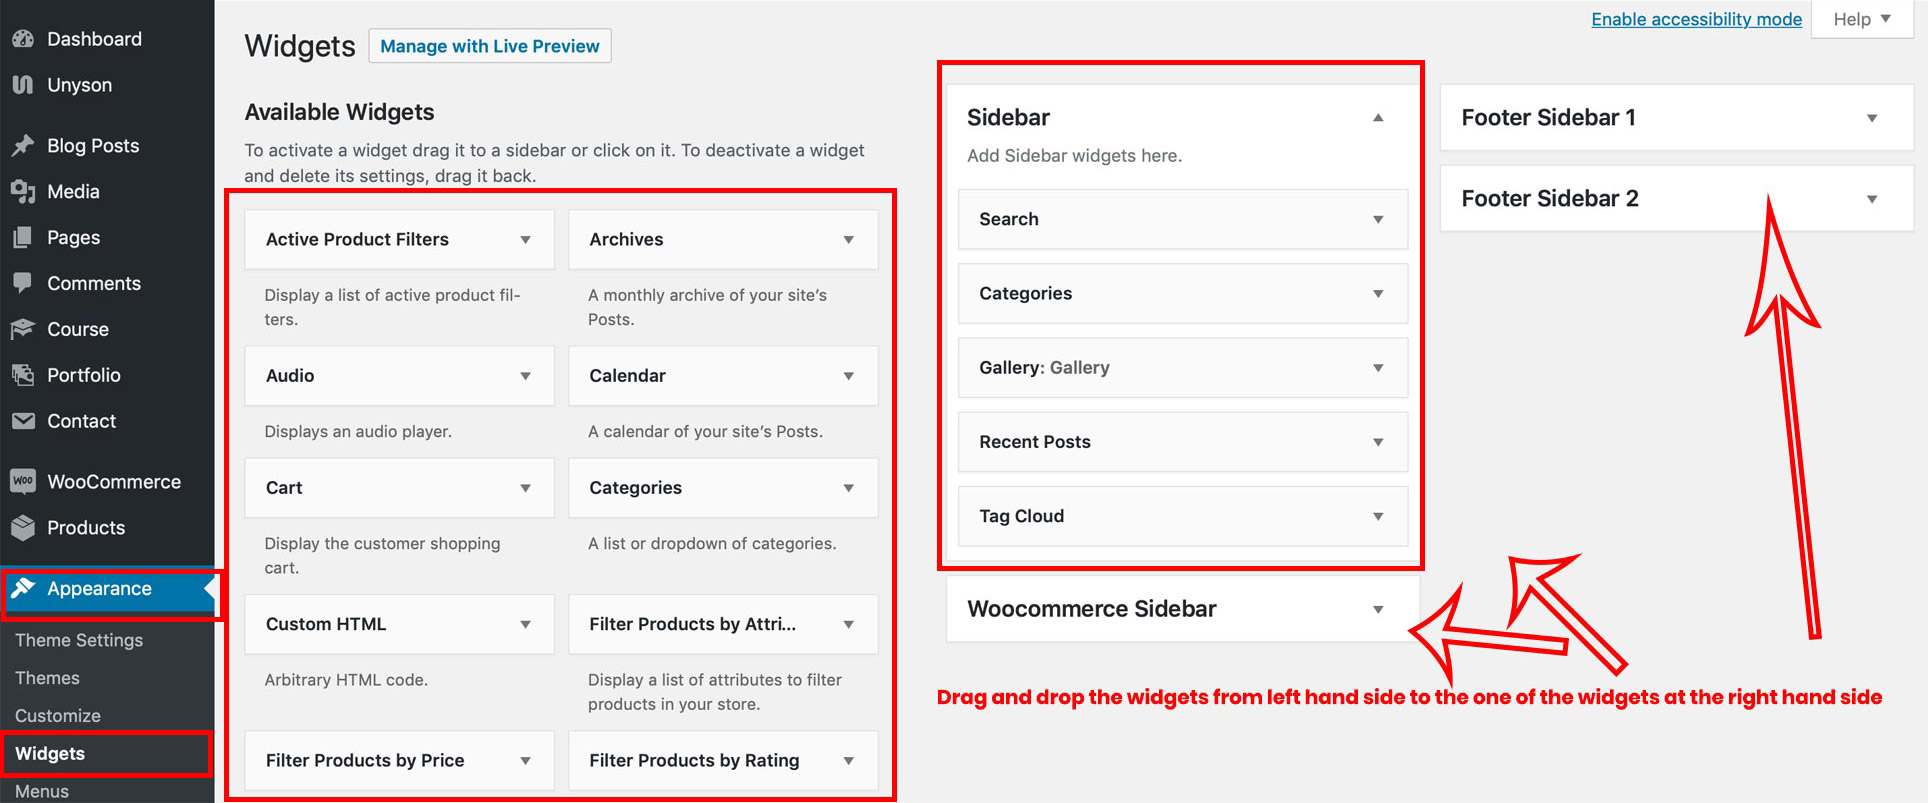
Vultur includes several custom widgets. All widgets are accessed in the Widgets section of the WordPress admin. Widgets can be added to any sidebar, footer column.There are various fields and settings present to choose for each individual widget all are self explanatory. You can put as many widgets as you want inside of a sidebar or footer.
Step 1 - Navigate to Appearance > Widgets to access the list of widgets and widget sections that they can be added to. The left hand side shows all the widgets you can use. The right hand side shows all the different sections you can add widgets to.
Step 2 - Simply drag and drop the widget you want into the widget section you want on the right hand side.
Step 3 - When finished, make sure to click Save in the widget editing box to save the widgets added to your sidebar.
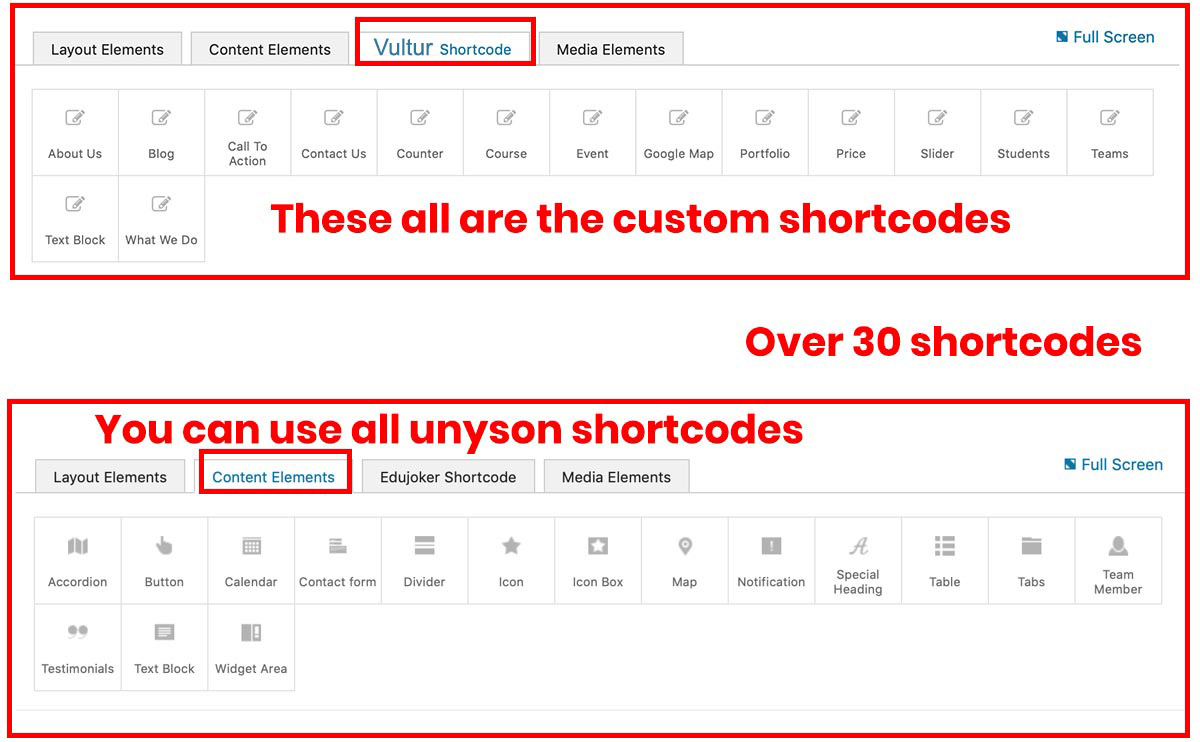
How to add shortcodes
Navigate to Pages > all New.
You can add more shortcode that belongs to builder shortcodes. All Pages are created with the Shortcodes.
You can use all Shortcodes from unyson framework and the custom created by Vultur Plugin. Enjoy the best Shortcodes.
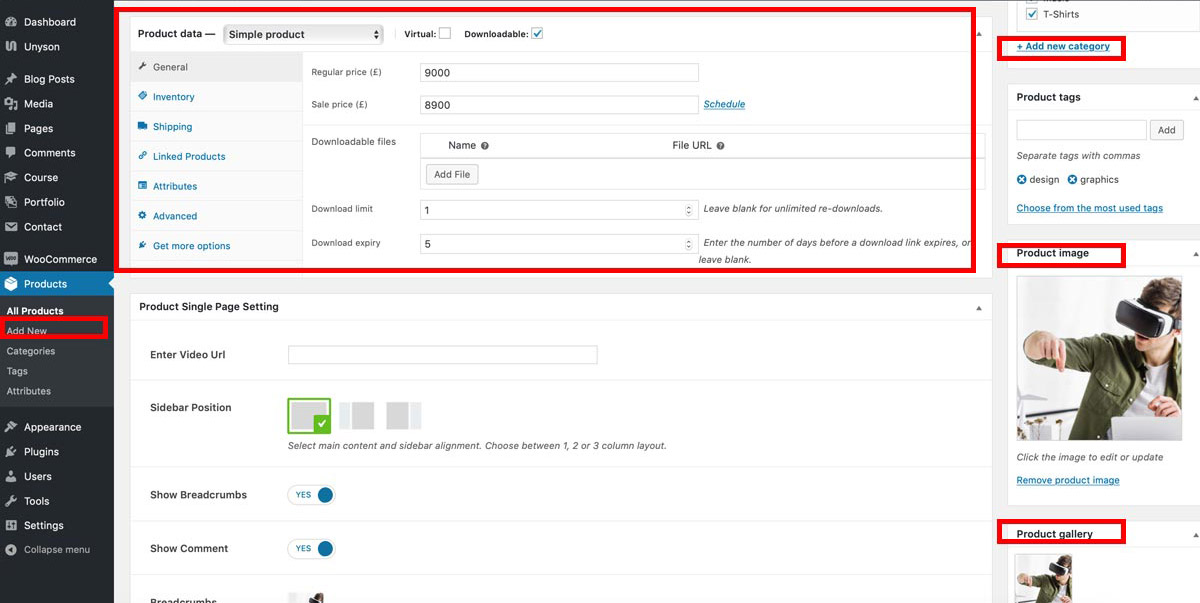
Navigate to Dashboard > Products > All Products.
This will Display the list of products.

Edit the product and change the information as per required.
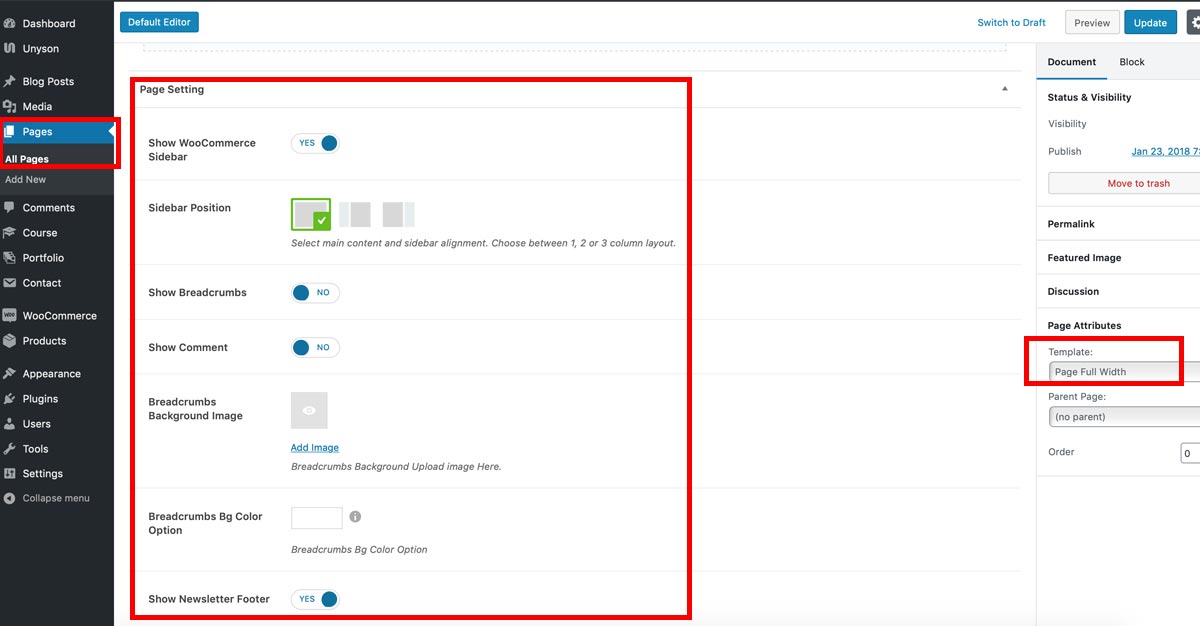
Navigate to Pages > all pages > Home Page.
Select Template: Page Full Width. Disable breadcrumb to get on the Top Slider with Shortcode. Follow the same instructions as mentioned under Theme Setting options. You need to develope pages with the shortcodes.
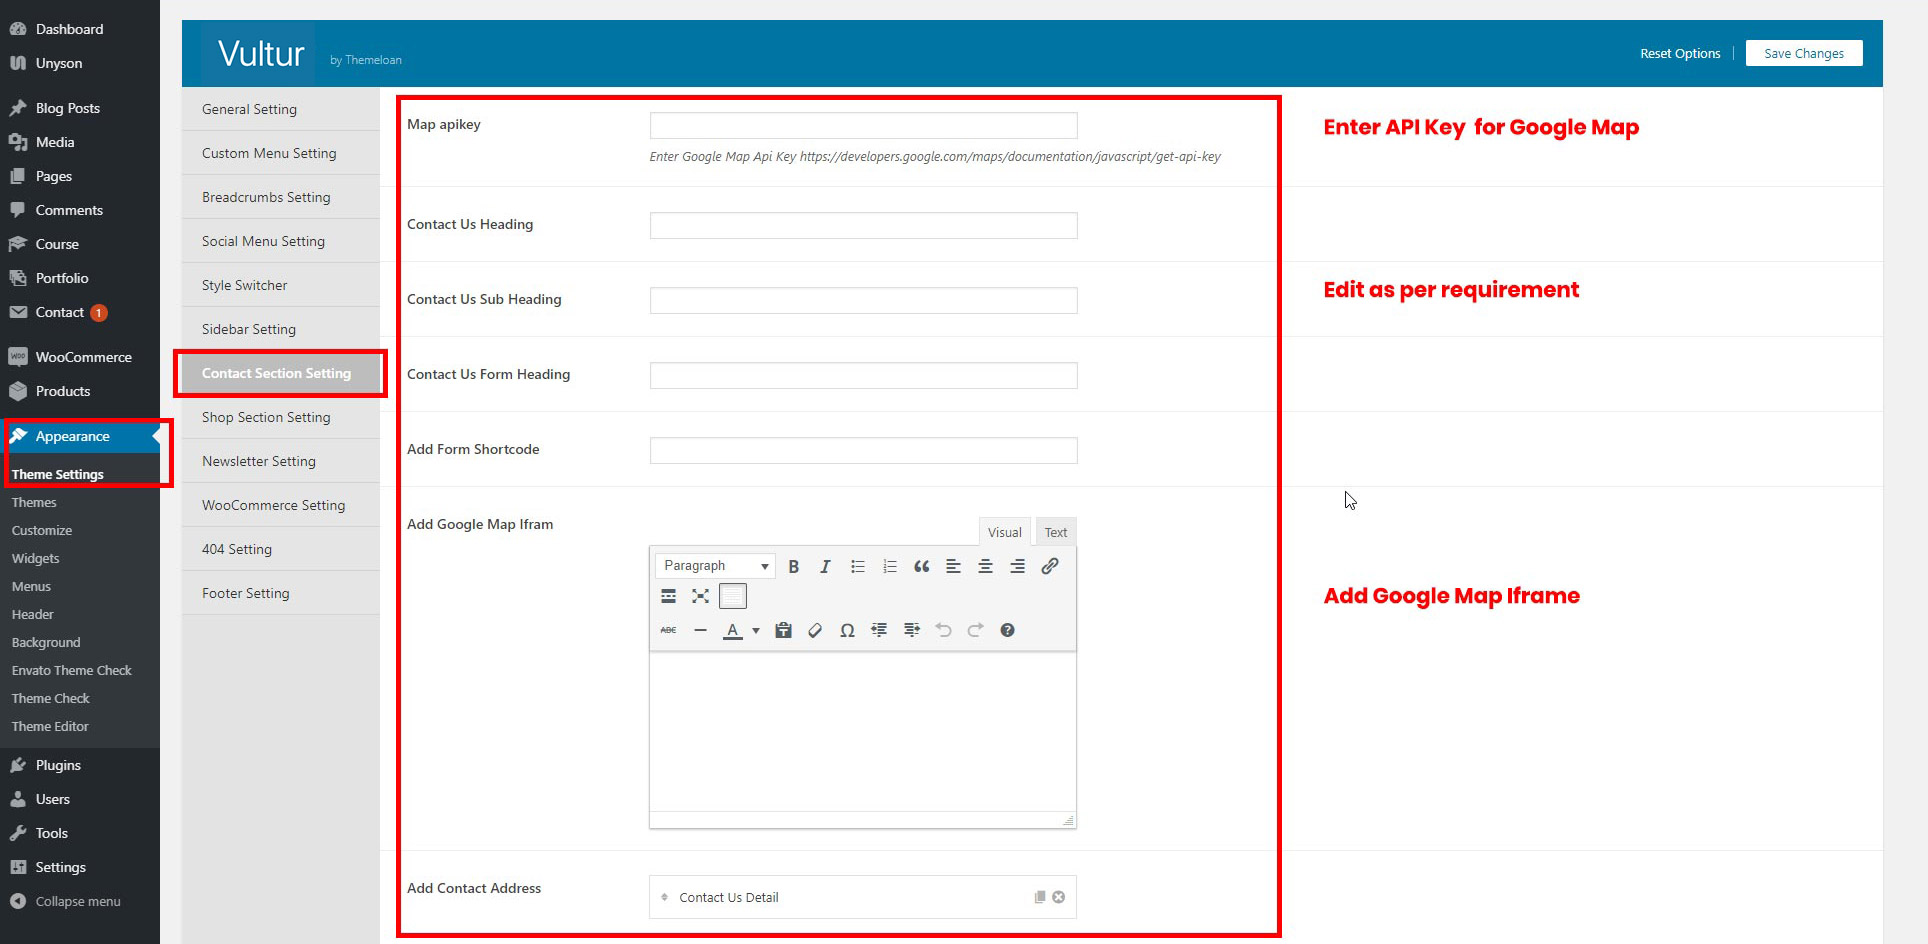
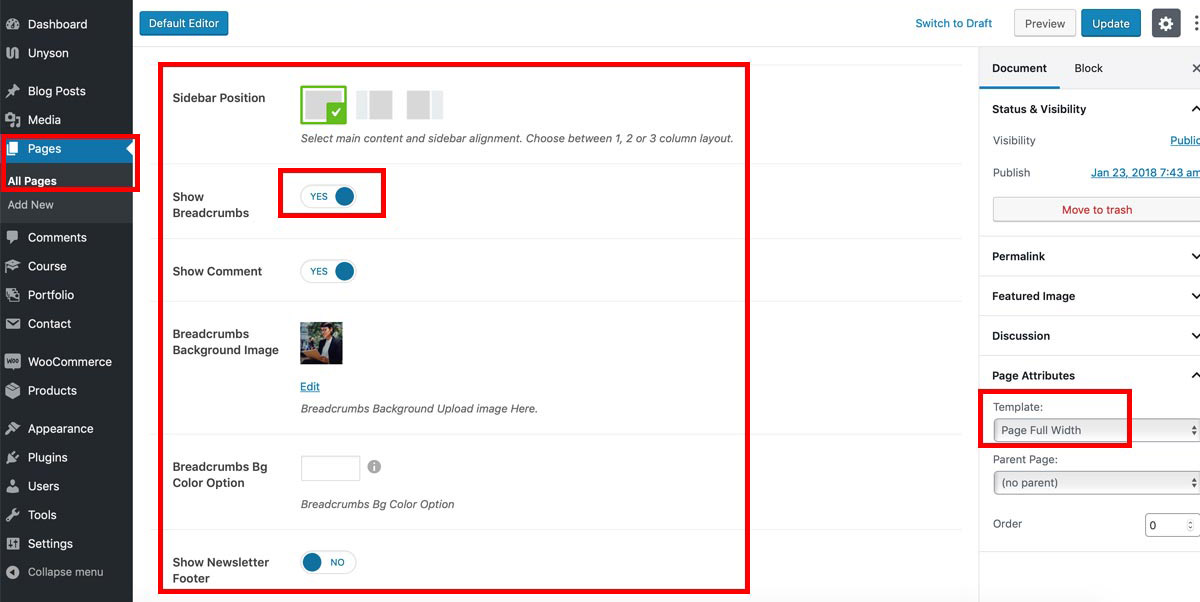
Navigate to Pages > all pages > Contact Page.
Select Template: Page Full Width. Follow the same instructions as mentioned under Theme Setting options. You need to develope pages with the shortcodes.
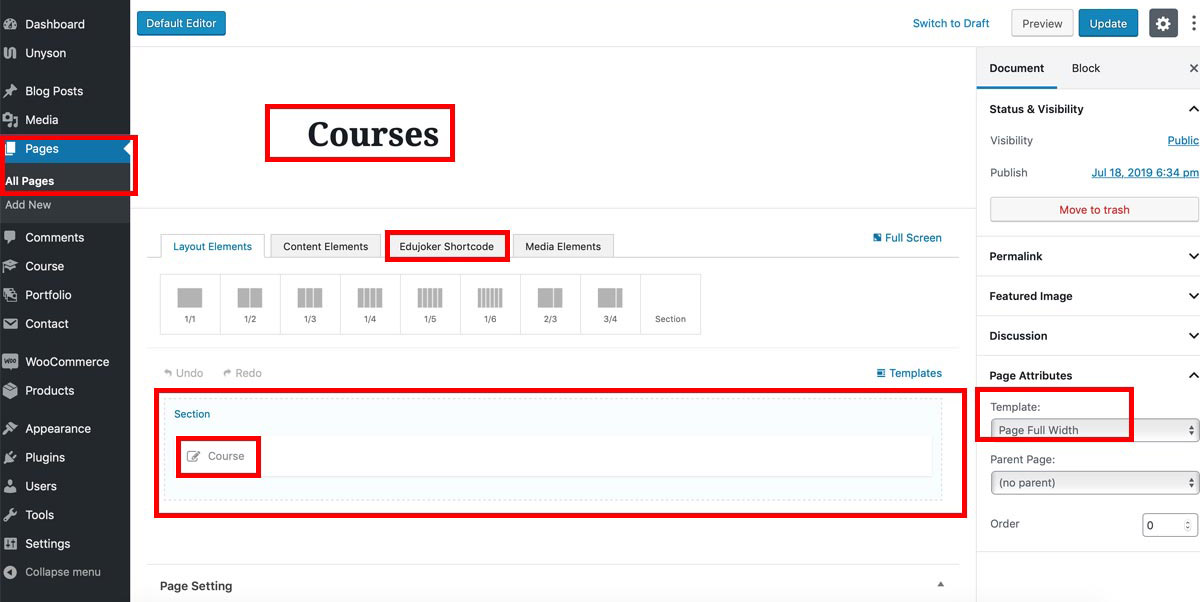
Navigate to Pages > all pages > Courses.
Select Template: Page Full Width. Sidebar Position: Full.
Use the shortcode Course to display all Courses. You can change Show Number Of Course and more options
Navigate to Pages > all pages > Course Detail.
Select Template: Page Full Width. Sidebar Position: Full.
The page ist created with shotrcodes from unyson framework and custom shortcode from vultur plugin. You can use unlimited Option to build the best Detail Page for the Course.


Once again, thank you so much for purchasing this Theme. As I said at the beginning, I will be glad to help you if you have any questions relating to this theme. No guarantees, but I'll do my best to assist. If you have a more general question relating to the Theme on ThemeForest, you might consider visiting the forums and asking your question in the "Item Discussion" section.
If you want to use any images used in the demo on your live website then do purchase theme from there respective authors, theme does not provide you rights to use this images.
Support Email: ioan@drozd.at
View Demo
Social Menu Setting
Social Menu setting consist of all social icons that can be show in menu.